
Posted on December 12, 2023 by KylieMawdsley
How to Update Your House Without Remodeling
While this blog post contains the top 8 ideas to update your home, it really could be the top 80 ideas. Seriously, there are SO many ways to save money when doing home improvement projects. However, for the sake of short attention spans, the best bang for your buck (and the amount of time it takes me to polish off a bottle of wine), I’m picking my top 8 quick makeover ideas.
Plus, what’s best for YOUR home could be different from the next. This is why these ideas have great mass appeal, applying to a wide range of homes from an assortment of decades!
This post may contain affiliate links. If you make a purchase through links on our site, we may earn a commission.
To make the list, I had prerequisites. Each idea presented here has to be a great bang for buck and has to be easy enough for the average homeowner or beginning DIYer…
- IMPACT (bang)
- AFFORDABLE (buck)
- EASY(peasy)
Are you ready Betty?
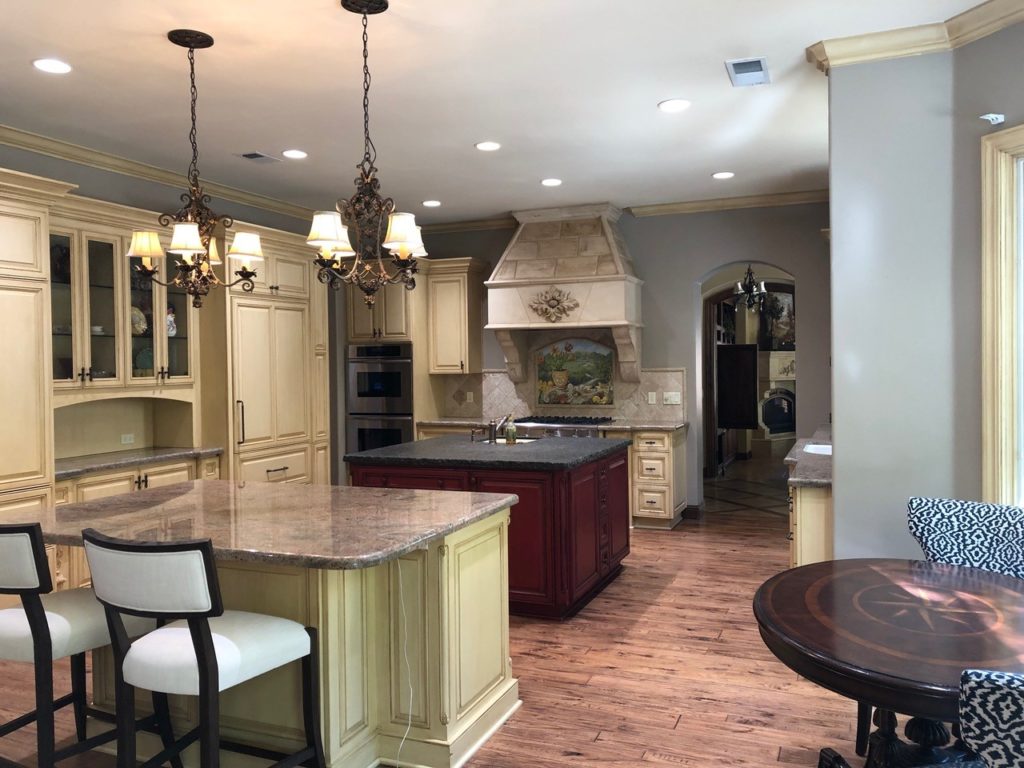
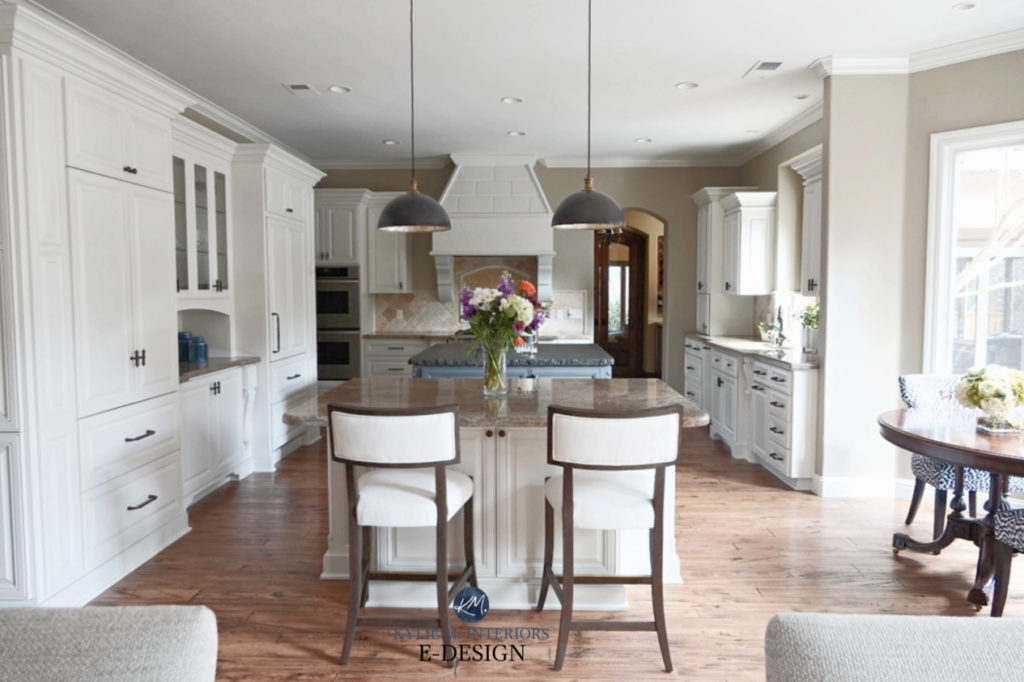
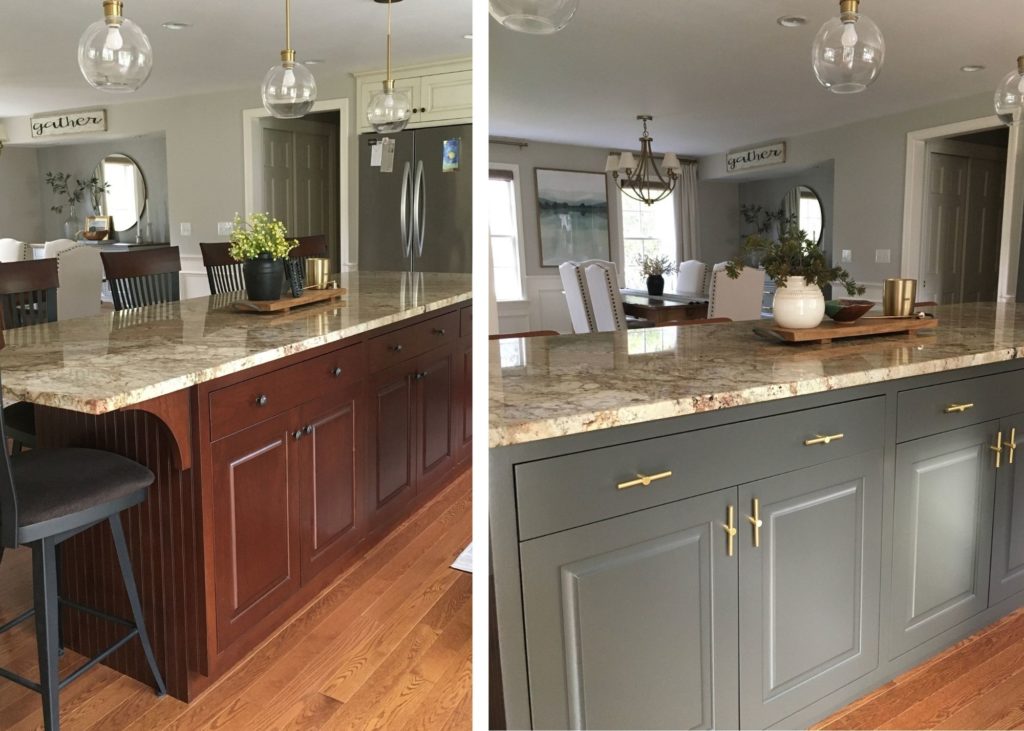
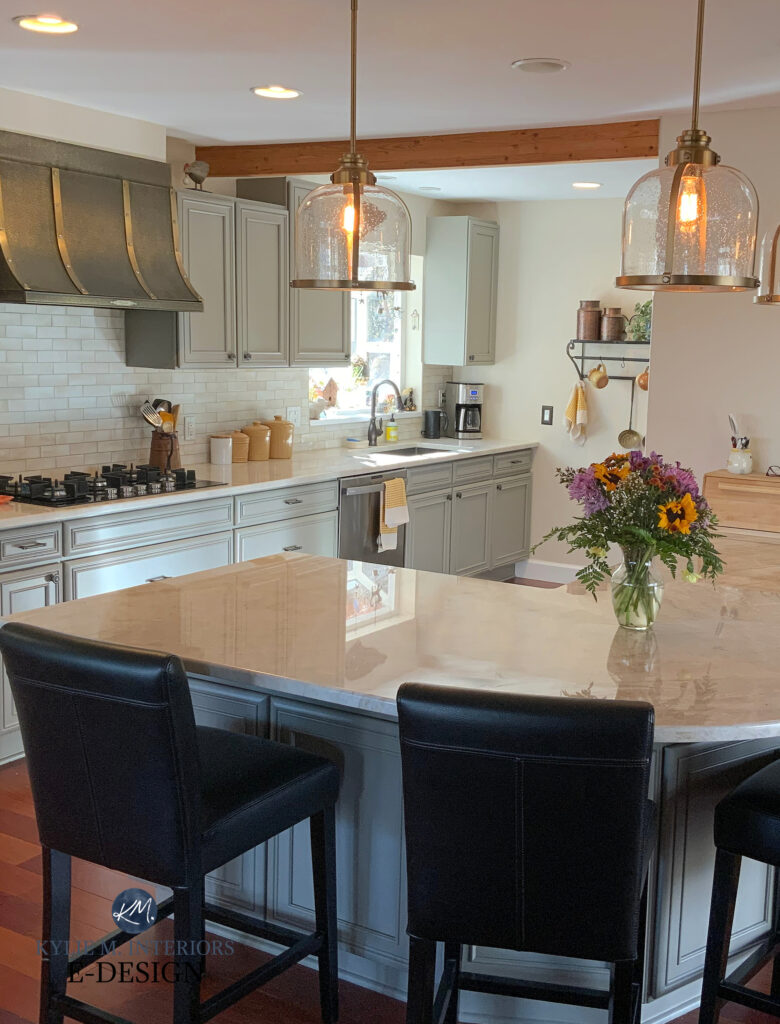
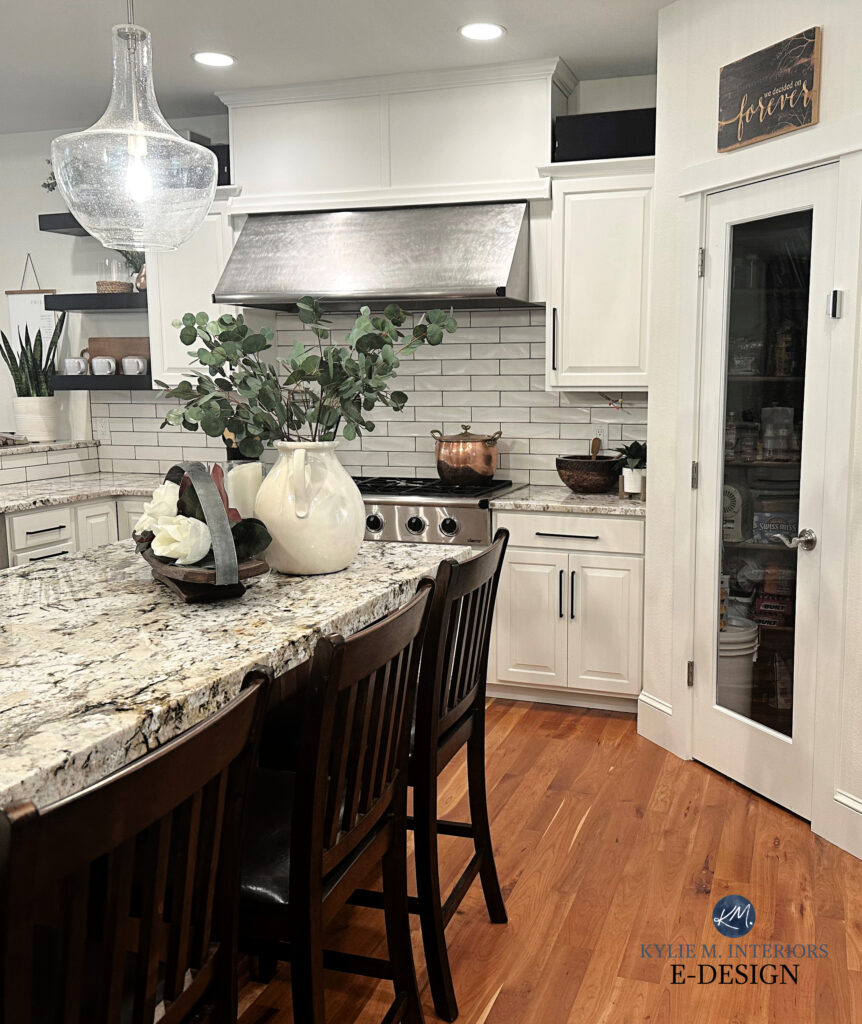
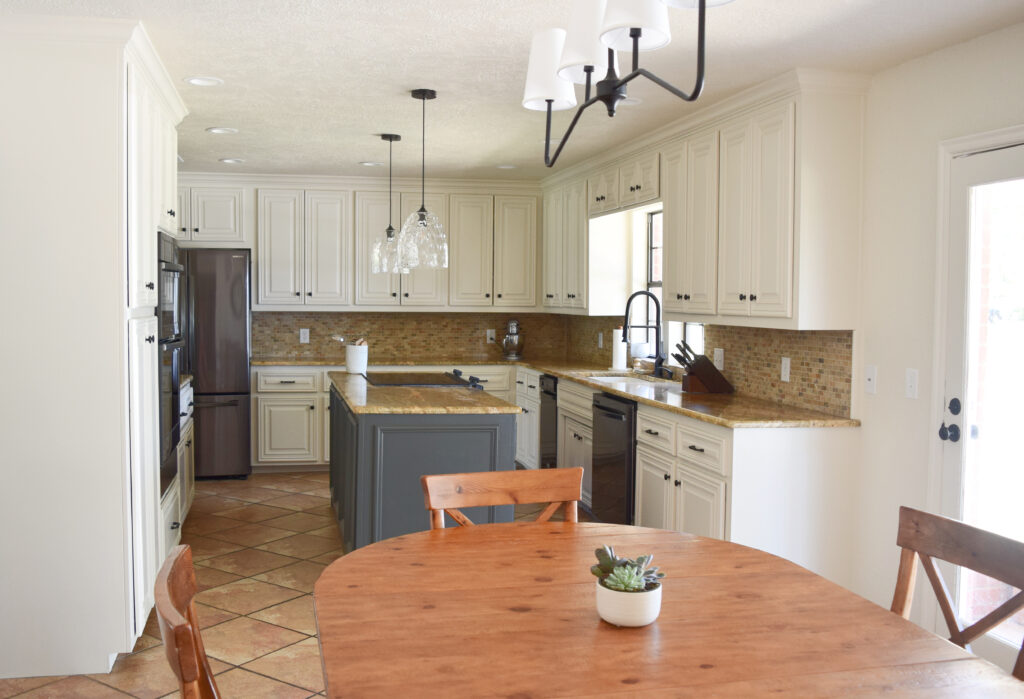
The ONLY things that changed in this huge kitchen were the light fixtures and painted cabinets, yet it looks like a whole new space!
Now you might think we’d start with the big bangers, like painting your kitchen cabinets, installing new flooring, or undertaking massive home renovations. Heck no, I’ve got WAY more tricks up my sleeve than that.
Besides, this is the START of your home update adventure, and sometimes the best place to start is with the easiest, most obvious, and most BUDGET-FRIENDLY ideas.
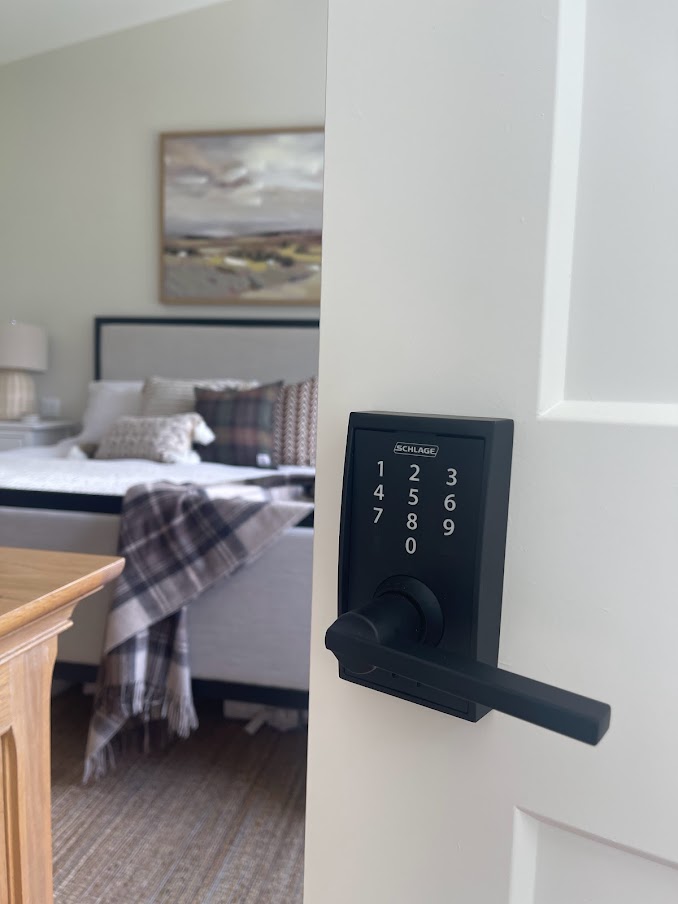
1. REPLACE INTERIOR DOOR KNOBS & HINGES
You might be underwhelmed by this idea, but once you’re done doing it, you’ll be VERY glad you humored the crazy lil’ Ginger.
I can’t tell you how many homes I see in my day-to-day consulting business where EVERYTHING has been updated…except the door hardware. And if there’s one thing that tells you EXACTLY which decade a home was built in (especially the 60s, 70s, 80s, 90s, 2000s), it’s the handle or knob you’re pullin’ on (yes, I allow for moderate knob pulling).
APPROX. COST TO UPDATE DOOR HARDWARE
If you do some smart shopping you should be able to do each door for under $50 (hinges and handle), maybe even less. If you go for a super tactile experience, you could get up to around $80, but I wouldn’t bother with anything beyond that.
I’m going to give you a few examples below. If you like the STYLE, but not the finish, still check it out as most handles have different finish selections.
HOWEVER, watch out for this particular one…
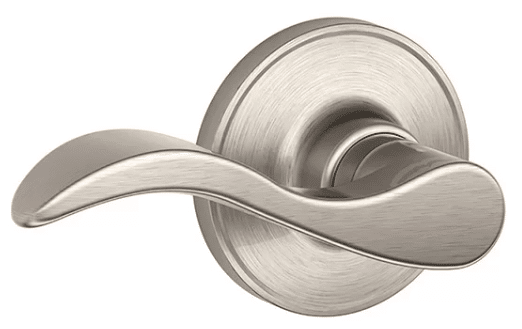
I don’t mind this handle’s style if I’m living in the early 2000s. Unfortunately, it still seems to be a reasonably popular choice, but in choosing it, you won’t be updating your home; you’ll be backdating it. This style was WAAAAY overdone in the early to mid-2000s and can look a bit dated compared to cleaner-lined options (especially in an oil-rubbed bronze finish).
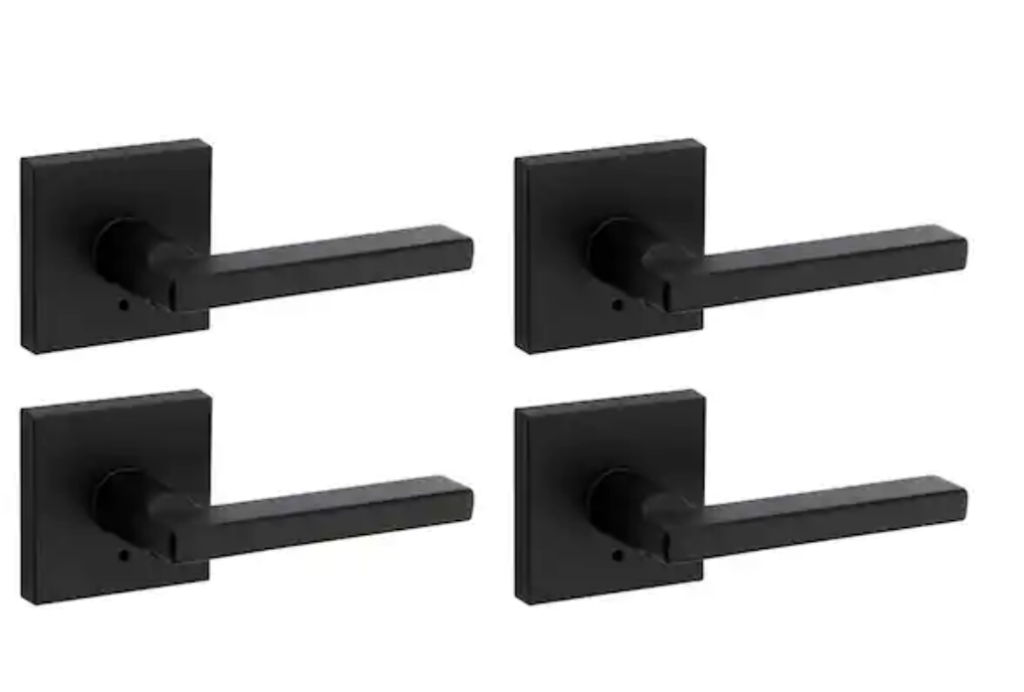
What’s trendy nowadays in door hardware? Let’s start with metal finishes.
MODERN METAL FINISHES FOR DOOR HARDWARE
Black hardware is HOT right now and should be for a while yet. However, I’m seeing a small turn away from homes clad ENTIRELY in black metal (hardware/lighting/faucets) and seeing a bit more moderation.
Some of it comes down to contrast – do you prefer HIGH CONTRAST or low contrast?
For the average interior door (which is painted some shade of white), black creates a high-contrast look. On the other hand, the muted look of a polished nickel is a lower contrast. As for gold, it’s another trend I’d be careful of, especially on door handles (for the average home).
Oil-rubbed bronze?
Be careful. ORB was the top choice in the Tuscan trend of the early to mid-2000s and was way…way overdone. If your home is a 2000s home and still needs to humor a moderate Tuscan style (as it costs too much to update EVERYTHING) this could still be a good finish. However, if you’re able to transition out to black, it could be a better way forward.
Black is a SUPER trendy choice of door hardware. However, you can also get this style in different metal finishes. Clean and simple…
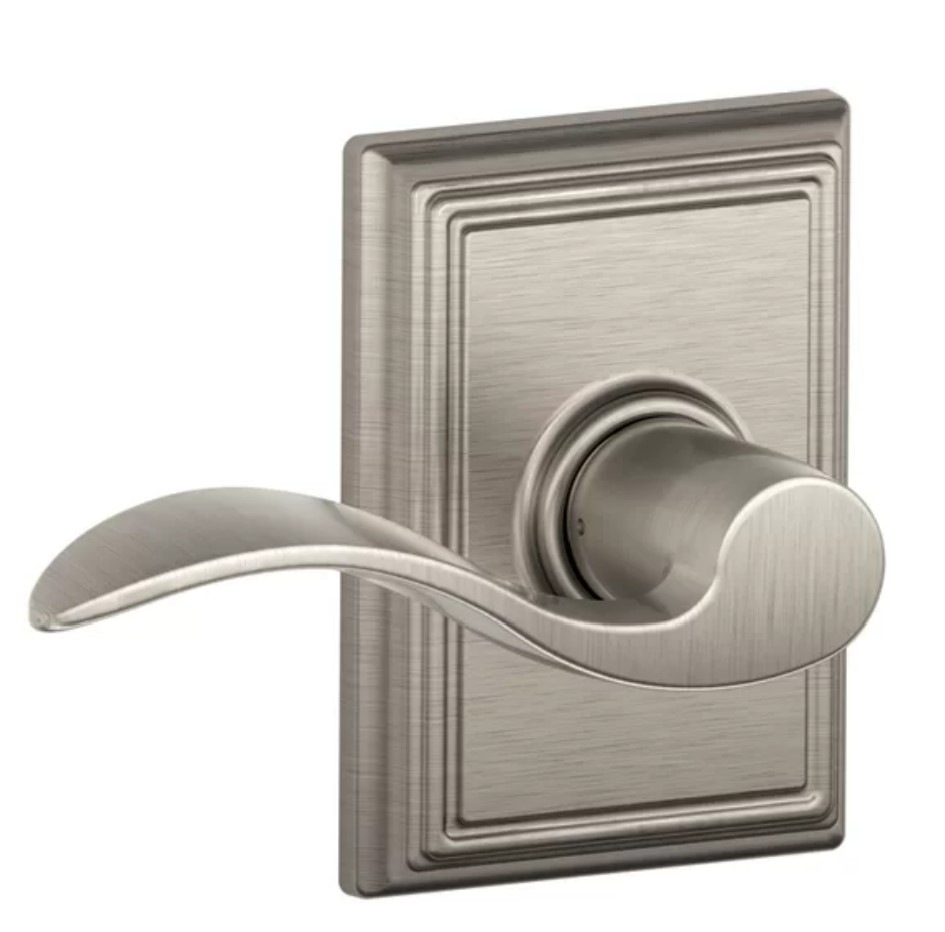
HOME DEPOT: HALIFAX HANDLE BY KWIKSET
While I usually lean into slightly higher-priced brands like Schlage and Weiser, when you’re on a budget, it can be hard to turn down a good deal (just don’t assume it will last forever…). At $20 a piece, you’re practically MAKING money.

WAYFAIR: Schlage Solstice Series non-locking / Solstice Series locking
If you like rounder lines with a modern look, I also like this one from Schlage…
HOME DEPOT: Schlage Latitude set closet/passageway
If you’re a bit of a knob, I mean, if you prefer a knob (wink wink), it’s definitely more popular in black than any other finish…
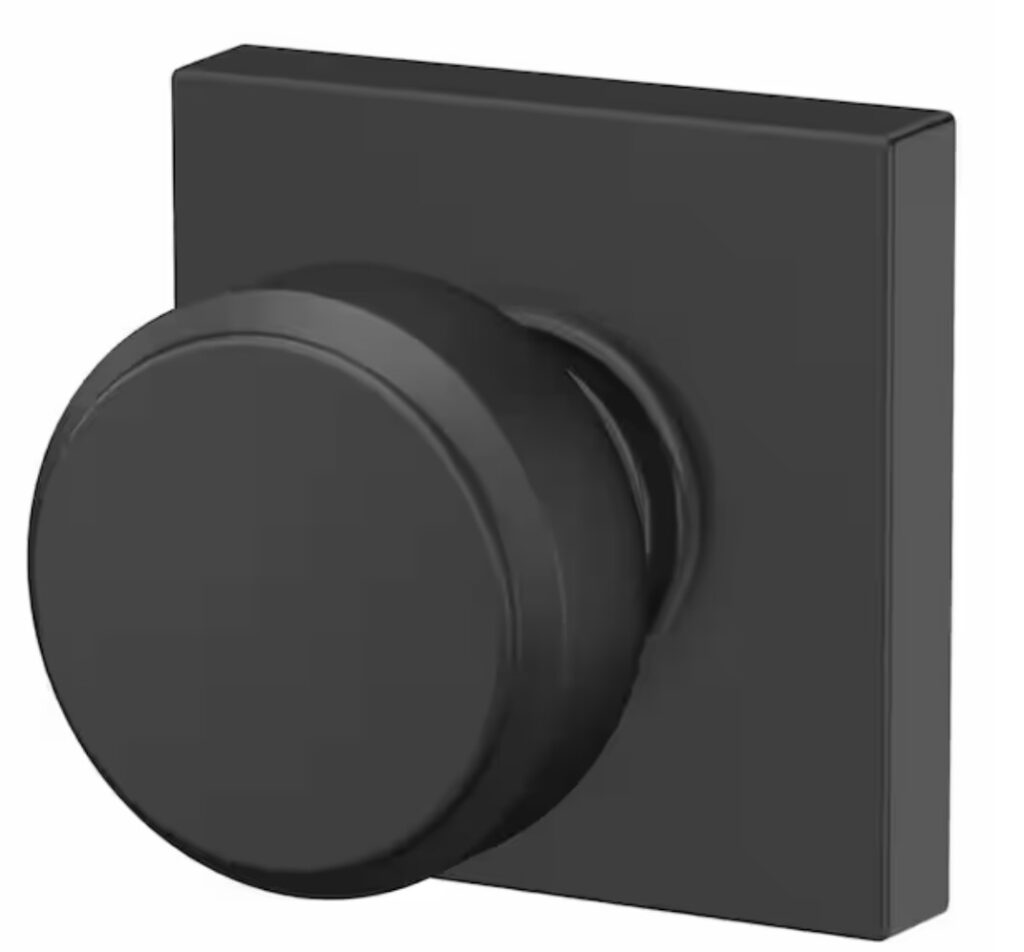
HOME DEPOT: Schlage Bowery knob with Collins trim
This next handle has a slightly more traditional vibe, with a modern approach. Sometimes we need a transitional style to get us to one trend, while still humoring parts of the previous one…
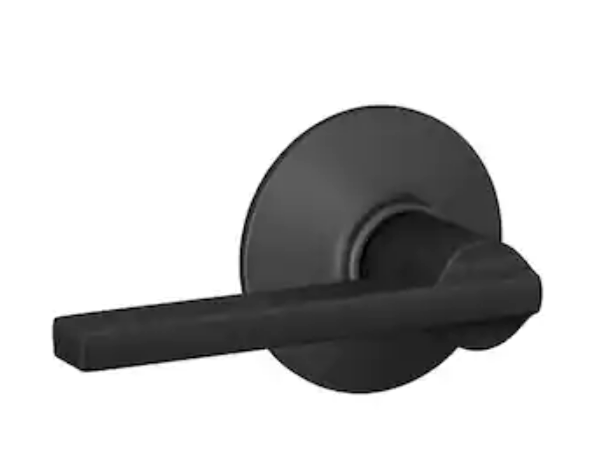
HOME DEPOT: Schlage Accent Lever, Traditional
I’m not going to say that I LOVE the curved handle, but again, I’ve got a lot of early 2000s homes stuck in my head, and the above style is often a happy medium between trends.
If you think your home can handle a SLIGHTLY more modern vibe, I love the Latitude set with Century trim…
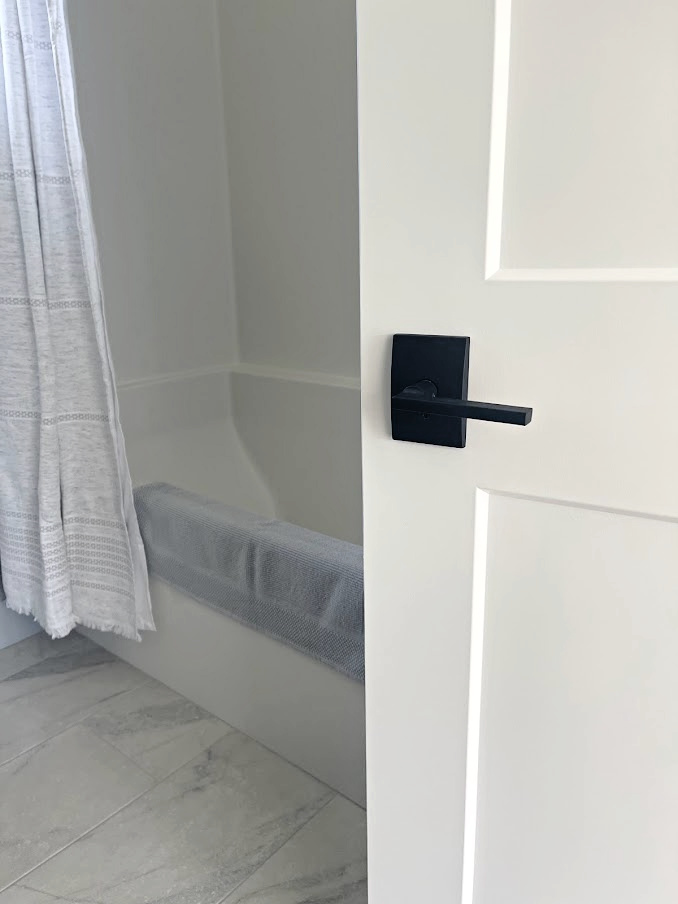
HOME DEPOT: Schlage Latitude – Century trim
The above door is at our lake home, as I chose the Century/Latitude combo for our bedroom, bathroom, and closet doors.
Read about my experience with SCHLAGE HERE
By the way, if you change your door handle, you will want to change the hinges, so they match. There are several different hinge profiles, so be sure to take one of your original hinges to the store with you to get the right size.
WHICH METAL FINISHES GO WITH EACH OTHER?
Naturally, you might find yourself wondering if you can mix and match metal finishes – you bet your cute little booty you can. Check out this quick guide.
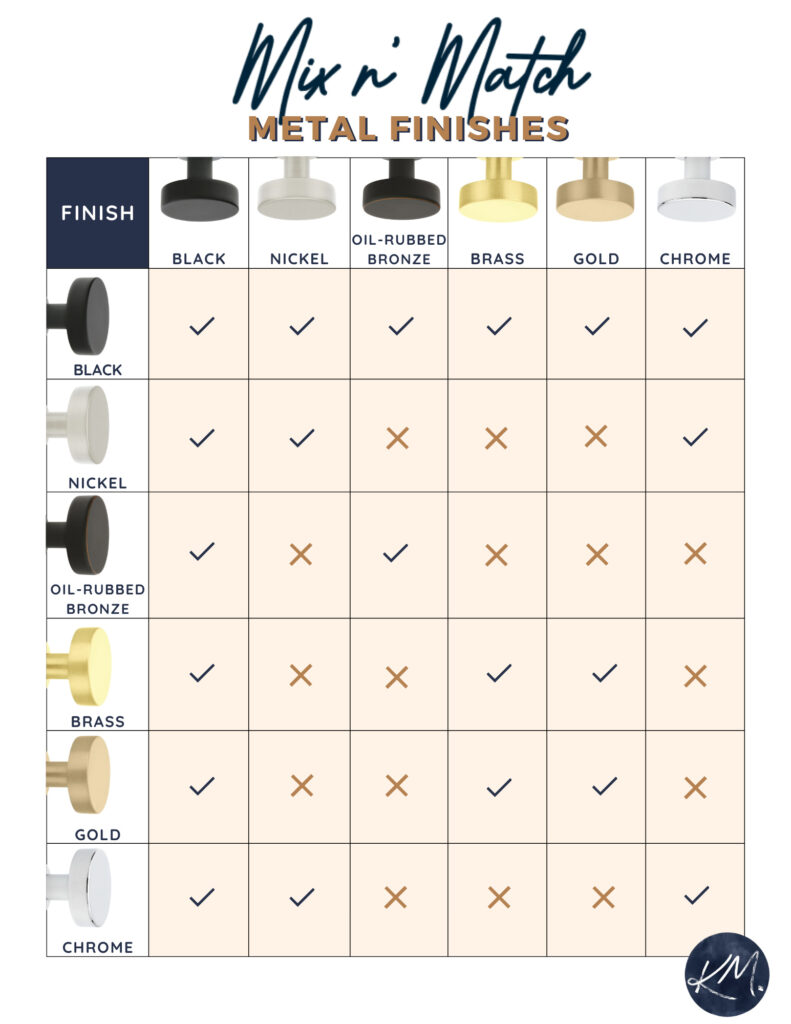
Are there exceptions? OF COURSE THERE ARE – don’t kill the lil Ginger messenger if you disagree with the above. I’m just here to get you started in the easiest way possible – and the above includes the most straightforward suggestions I’ve got.
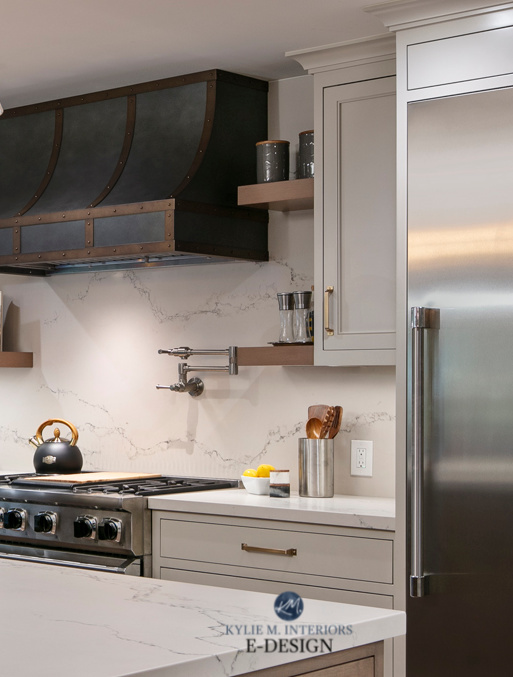
2. HOME UPDATE IDEA – CHANGE YOUR CABINET HARDWARE
Almost every cabinet door style needs hardware. Sure, some uber-modern, sleek cabinets are better without. You’ll also find some European cabinet styles that couldn’t support hardware if they tried! However, the average home with cabinet doors, whether they’re shaker style, flat, raised, or recessed panel – they need handles and/or knobs.
While there are exceptions, eg. some modern homes suit handles on the doors, more traditional and transitional style homes suit knobs over handles on the doors.
For the average home, aim for a knob on your doors and a handle on your drawers (a good life motto).
COST TO REPLACE/UPDATE CABINET HARDWARE: $200
Assuming your kitchen needs 15 handles and 20 knobs, averaging about $7 per handle and $5 per knob – on the high side, that comes out to about $200. Of course, you can always spend more or less, but that price range should satisfy most styles.
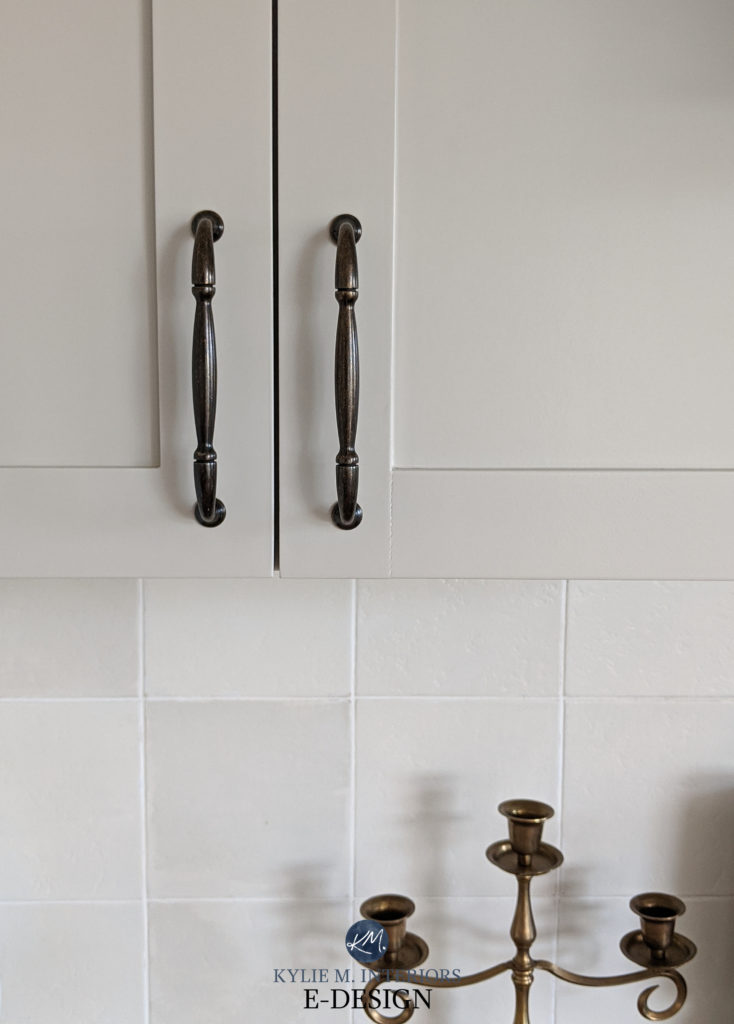
WHAT’S THE BEST METAL FINISH TO UPDATE CABINET HARDWARE?
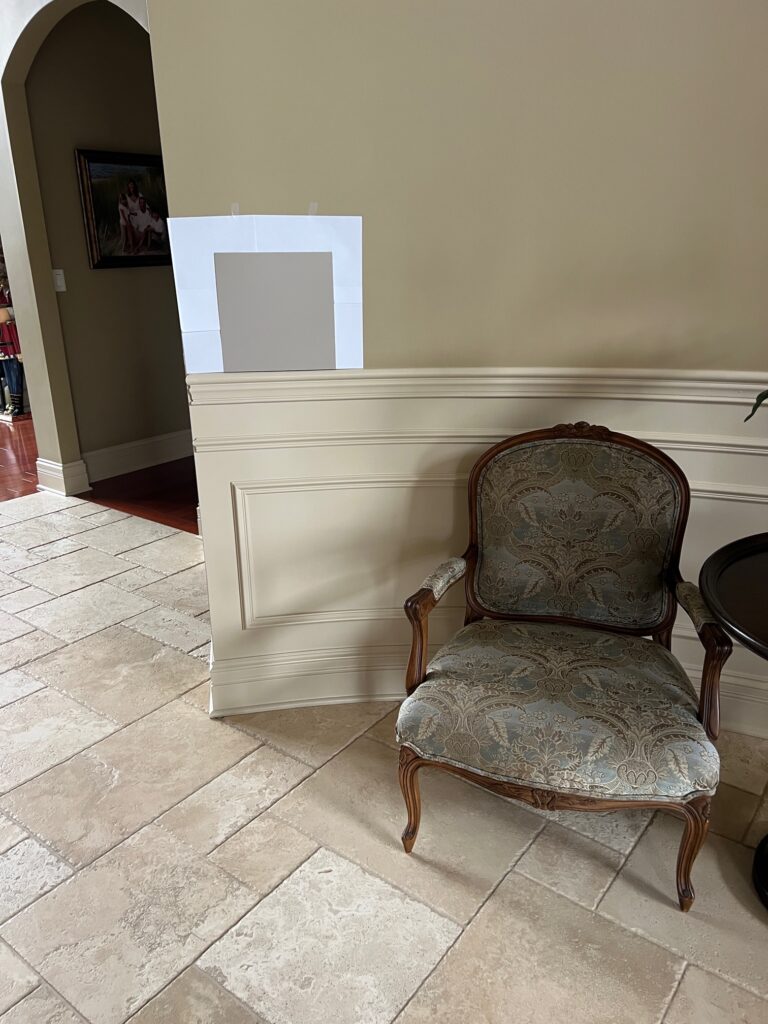
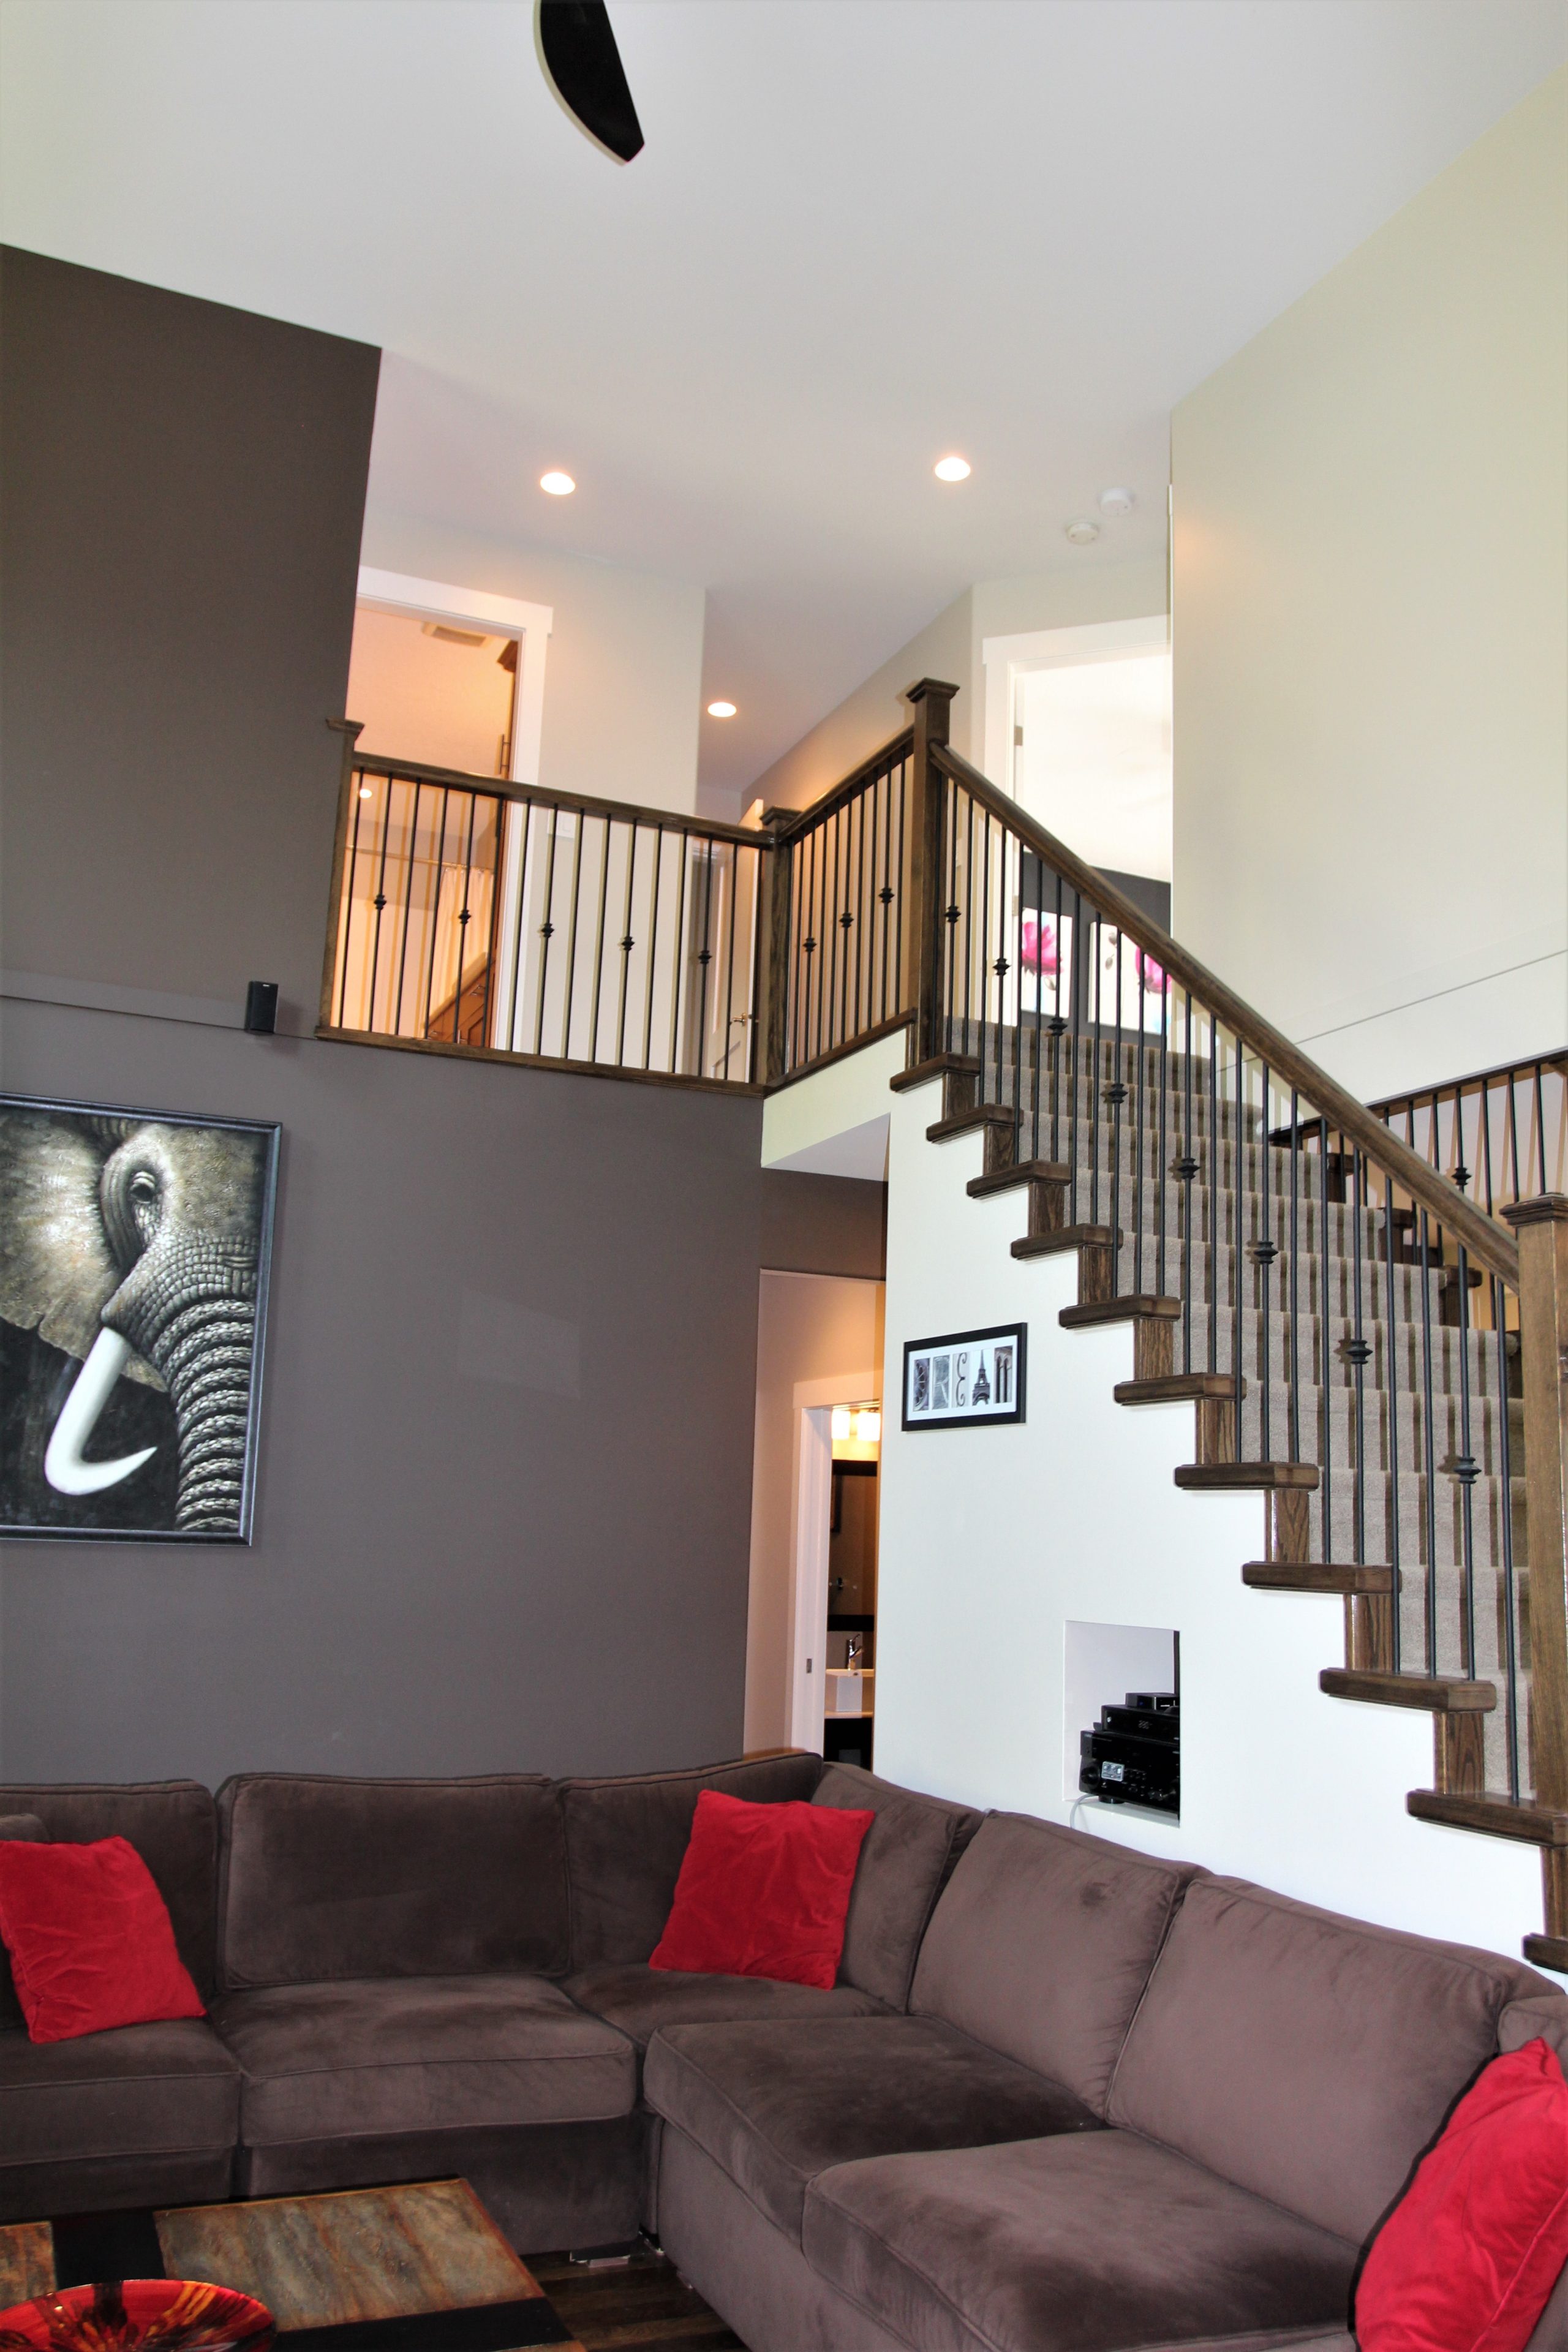
Look to your existing metal finishes – light fixtures, cabinet hardware, and metal stair spindles, as clues for what finish to choose. If none of those is updated (in other words, they’re probably brass), then choose black. Black is great as a transitional finish when you have gold or antique brass. This works great if you’re on a budget and can only replace a few things at a time.
Black is the most flexible hardware finish if you’re transitioning from an outdated style to an UPDATED one, but can’t afford to replace everything at once.
As for which finish is BEST, there is no ‘best metal finish’. Sure, there are TRENDY ones, but they’re irrelevant if they don’t suit your kitchen. The best metal finishes for your kitchen should complement the color or stain of your cabinets, as well as the surrounding light fixtures (keep reading for a few more specifics).
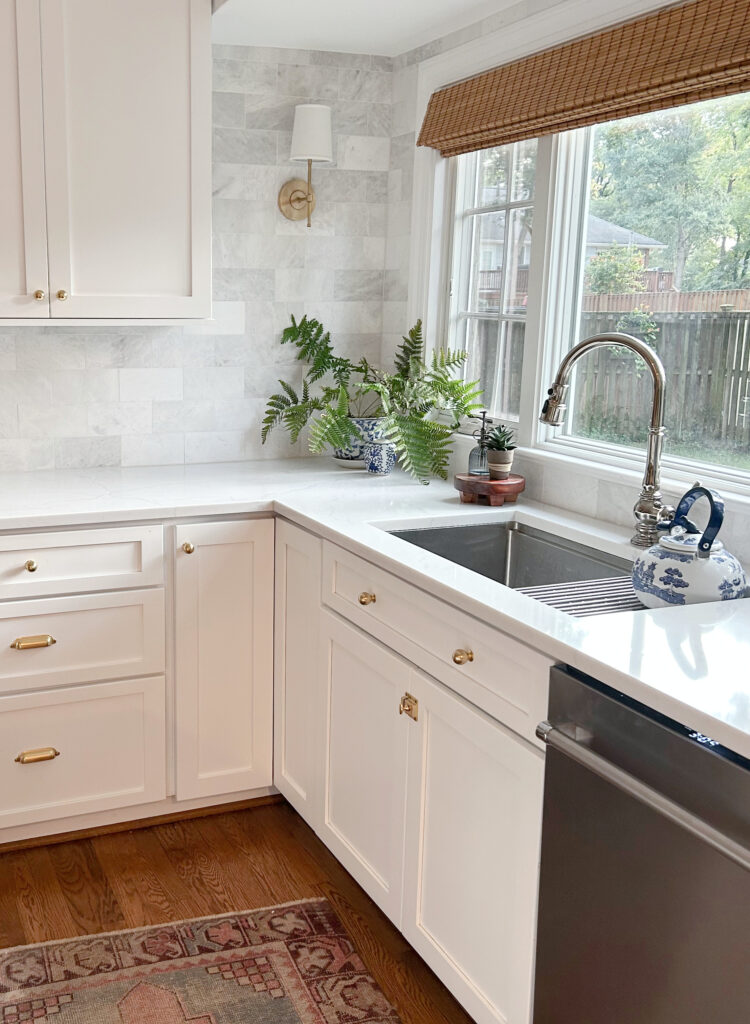
The above kitchen easily pulls off a mix of chrome and gold. Why? Part of it is due to the more traditional styling of the space, another part is the attention to detail in the hardware, light fixture, and faucet. The average home can’t pull it off nearly this well.
Also notice how well the small knobs and moderate pulls suit the traditional, homey style of this kitchen – PERFECTION!
A FEW CONSIDERATIONS
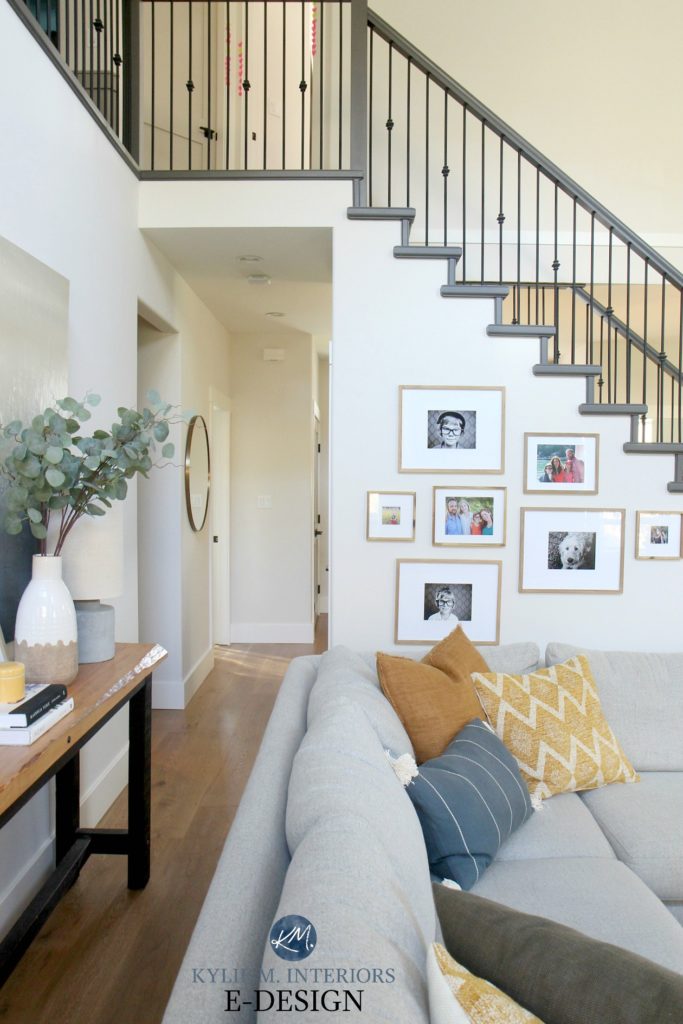
1. Do you like low or high contrast? If you have white or off-white cabinets, black hardware will be high contrast, whereas nickel will be lower contrast. Gold/brass will also have a lower contrast, whereas oil-rubbed bronze will have a higher contrast. If you have wood cabinets, depending on the depth of your stain, you might opt for either finish, depending on the look you want and the contrast it creates.
This antique brass hardware is low contrast on the Revere Pewter cabinets
These black handles are in high contrast with the warm white cabinets
2. What other metal finishes need updating in this space? If you’ve already updated your lighting, do you want to match its metal finish or coordinate? If you haven’t updated anything, your cabinets will set the stage for moving your home forward!
Is Black Still a Trendy Finish For Hardware, Light Fixtures & More?
3. Does your home suit curved, rounded lines, transitional lines, or a more sleek, straight profile? The style of your bedroom doors and kitchen cabinets can give you great clues. If your doors have arched or curved lines, your hardware should pick up on this or at least be transitional (in the middle). If your doors have square, 90-degree angles, you might go for a transitional or more sleek style.
As it stands right now, here’s the breakdown for the average home…
- BLACK HARDWARE: 50%
- POLISHED NICKEL: 20%
- GOLD/BRASS: 20%
- OIL RUBBED BRONZE: 10%
How do I know this? I spend 3/4 of my day doing Online Color Consulting – I see a lot of homes.
WHAT STYLE OF CABINET HARDWARE IS TRENDY RIGHT NOW?
Again, the best style for your cabinets comes down to your personal tastes and what suits your kitchen. Many people lean too modern for their kitchen, which can make the existing finishes look even more dated than they are.
Decorate for the home you have, not the home you WISH you had.
I’m OBSESSED with this kitchen update, using one of my favorite quartzites – Taj Mahal
Just as with door hardware, it’s often about finding transitional pieces that honor the bones of your home while taking you a step further into the next decade (or 50, depending on your home). The trendiest hardware style is the one that SUITS the style of your kitchen cabinets. There’s nothing worse than a country-style arched cabinet door with sleek-lined modern hardware. Check out this blog post for hardware ideas to suit your door style HERE.
KYLIE M’S FAVORITE CABINET HARDWARE
Remember two things before you start clickin’. ONE – most of these come in a variety of finishes, not just what I’ve linked to. TWO, if the size isn’t right and you’re painting your cabinets, DRILL & FILL baby and start again!
1. LIBERTY MANDARA HANDLE (black) / COORDINATING KNOB is my favorite style right now as it’s super transitional and doesn’t have bits sticking out beyond the bolts to catch your pockets on. Here it is in satin nickel, looking equally as gorgeous.
2. GLIDE RITE MATTE BLACK PULL is a popular look with clean, simple lines (available in several sizes, although I do love this one for drawers). This is one style that best suits handles on ALL doors/drawers – no knobs.
3. LIBERTY ARTESIA is a lovely gal for a slightly more contemporary look. Ooookay, so that’s another one that really just suits itself – sans knob.
4. AMEROCK REKNOWN is gorgeous and its accompanying knob is equally as nice.
5. While it’s a bit more expensive, I love how the WESTERLY (knob here) has cute little feet (the bit that meets up with the cabinet door). This is a nice modern/traditional blend.
If you want to see some great knobs, this is NOT that kind of website! Just joking, let’s look at some cabinet knobs…
6. LIBERTY GARRET is pretty multi-use, meaning it suits a wide range of handles, as long as they have the same finish. And for that price, you’re practically making money.
7. This FRANKLIN BRASS is another great, flexible black knob.
Now if you happen to like this style, let’s have a quick little chat…

HOME DEPOT: Franklin Brass handle
See those little wrap-around bits that kind of hug the long post? These are what save these from being outdated. Other styles are similar, but are one continuous piece, with bits that hang over the bolts – don’t get those, these are better. HOWEVER, keep in mind that those sticky-outie bits are TERRIBLE pocket catchers.
- Also, avoid the above style with long ends like this.
- Whereas the above one hugs the post, this is the non-huggy one I was referring to – don’t do it.
BONUS NOTES
-
Make sure to measure the distance between the holes (NOT THOSE HOLES, YA WEIRDO!), so you get hardware that is the right size.
-
If you have handles and are painting your cabinets, consider filling/sanding a hole (or both for new/best positioning)and installing knobs instead. Buying a template like this one from Home Depot will make your life ten times easier.
- Don’t just focus on the kitchen, do the bathroom, laundry room cabinets, and CLOSET doors as well!
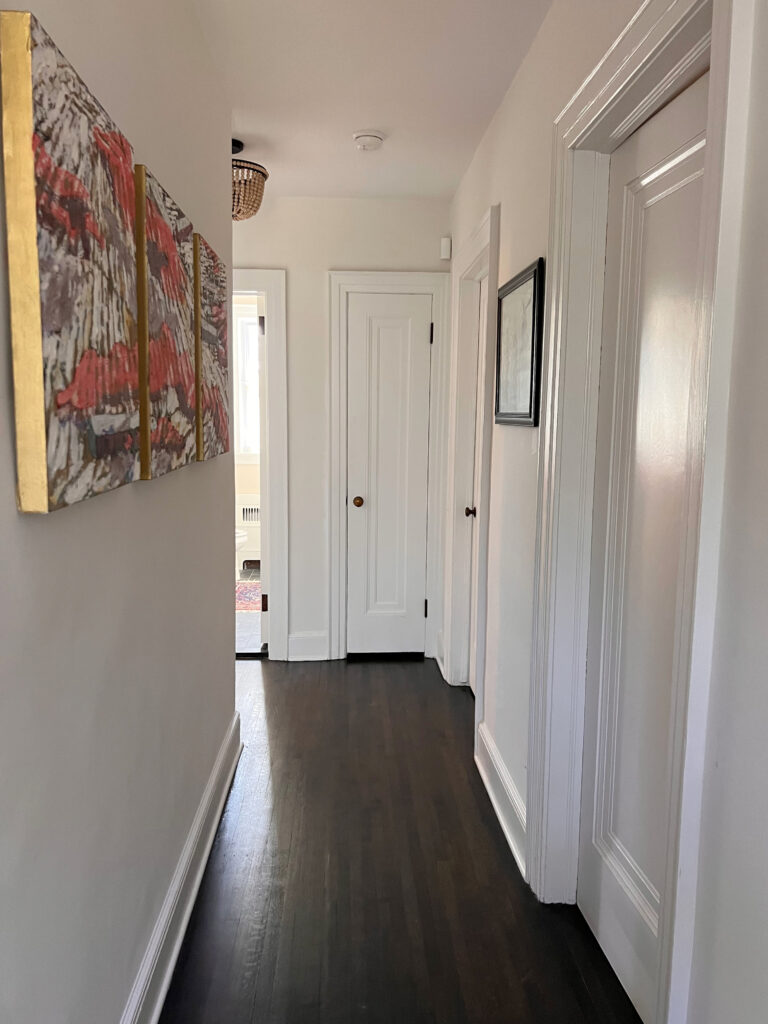
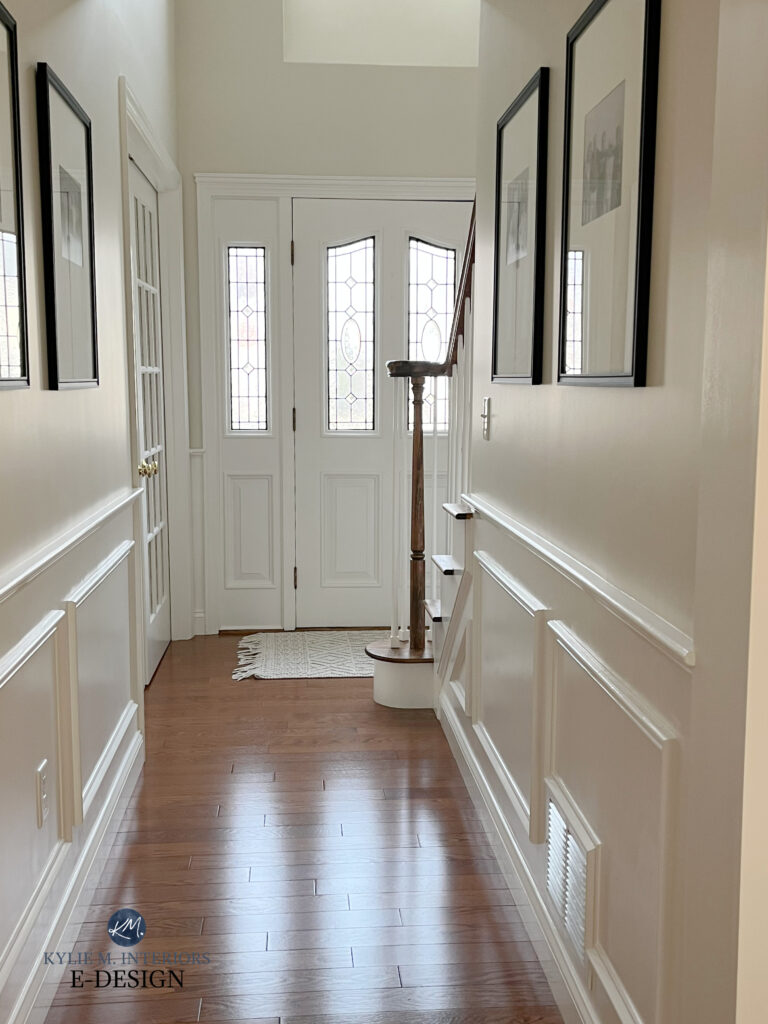
3. PAINT TRIMS & DOORS
APPROXIMATE COST: Under $100 (paint, brush, rollers)
If you have white or off-white trim, refreshing it with a few coats of paint in a flexible, popular shade of white will move your home forward in a big way.
Or maybe you don’t realize that your white trim is looking a little rough around the edges. I keep a pretty darn tidy house and relatively clean baseboards. However, every few years I freshen up my trims and it’s shocking what a difference it makes.
Have your trims been refreshed in the last five years?
Many people start by painting a single room, but don’t want to paint the trim – it’s a big job on a large scale. However, the wrong trim color, especially the overly warm whites and creams will limit you as to wall colors. Many of the most popular, updated paint colors don’t suit outdated trim colors.
Start with your trim and work out from there.
For example, the trim color in this 2000s home will forever hold this home back from looking updated and modern because of its warmth and depth…
To accommodate the trim, the walls have to be painted a slightly darker, heavier, not-so-trendy neutral paint color. Will it be BEAUTIFUL? Absolutely, it just won’t be UPDATED.
If you have wood trim and doors and they date your home, consider painting them white to refresh and update your space. This applies specifically to homes built in the 60s – 90s when there was an overabundance of narrow dark wood baseboards, window casings, and doors. In some modern or old homes, some wood trims can be gorgeous as the quality and scale of the wood is often better. However, in others, this dark wood sucks the living daylights out of a room.
In a gorgeous home like the one below, the wood trims and doors are fabulous. However, combined with the dark beige walls, they weigh the space down. Now, a home like this doesn’t necessarily need to look updated to today’s standards, but it does need to be the best version of itself.
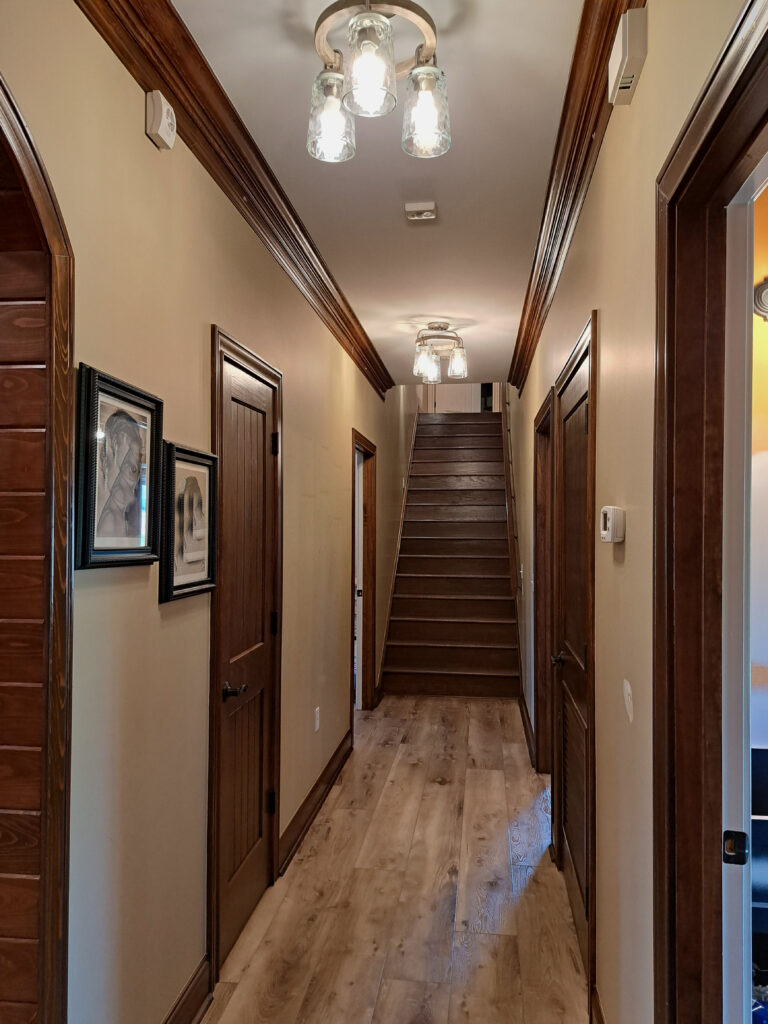
The best way to freshen up the above space is to keep the wood and lighten and brighten the walls with a flexible warm off-white paint color.
STEPS TO PAINTING WOOD TRIMS & DOORS
1. Tape off walls and floors and lay down dropcloths – you don’t want to spend more time cleaning up from your paint job than you spent doing it.
2. Fill any holes with wood filler and let it dry.
3. Lightly scuff sand with 220 grit sandpaper – just a basic exfoliation is good.
4. Use a primer like Zinsser oil base primer (I know, it stinks and takes longer to dry but it’s most likely to ensure the adhesion of your paint). Many of these wood trims have an oil finish on top of them and aren’t going to take new paint easily. If you prefer a non-oil primer, I totally forgive you.
5. Apply 2 -3 coats of paint. Brush only where necessary and do the rest with a 10-13mm nap 5″ roller.
AND REMEMBER, paint can take up to 3 weeks to properly cure.
Which Two White Paint Colors Go Together?
Be kind and gentle. If you hit it the wrong way it CAN peel off, but give it time, and with the proper prep work, it should be rock solid.
WHAT’S THE BEST WHITE PAINT COLOR FOR CEILINGS, TRIMS & DOORS?
My three favorites are Sherwin Williams Pure White, Benjamin Moore Chantilly Lace, and Benjamin Moore White Dove, there are a BUNCH more gorgeous options out there.
The ULTIMATE GUIDE to White Paint Colors
WHAT’S THE BEST PAINT FINISH OR SHEEN FOR TRIMS & DOORS?
The average home suits satin finish on trims and doors. If you want more thoughts/details, read here: The Best Paint Finishes for Any Surface in Your Home
Benjamin Moore Ballet White and White Dove
When painting doors…
-
always remove the handle/knob before you paint the door, otherwise, you’ll spend many tedious hours painting around handles and end up with a less-than-ideal finish with brush marks
- only use a paintbrush around the hinges (and tape those hinges off).
Keeping your wood trim and doors? Check out this blog post for some great coordinating paint colors –The Best Paint Colours for Dark Trim
Stop using expensive paint sample pots and save money with PEEL & STICK PAINT SAMPLES!
Plus, they show up on your doorstep in 1 DAY!

CHECK OUT SAMPLIZE HERE
4. PAINT THE INSIDE OF YOUR FRONT DOOR
Painting the inside of your front door is one of the most effective bang for buck update ideas. Not only does it define your entryway, but it also adds personality!
APPROX. COST -$50
A FEW REASONS TO PAINT THE INSIDE (& OUTSIDE) OF YOUR FRONT DOOR
-
In our previous home, the entryway had THREE doors that all looked the same and were all shut 95% of the time (front/garage/suite). This created an opportunity to single out the main door and paint it a key color. If there is any door confusion at all, then pick out your main door and give it some TLC.
- Your front door is a direct backdrop or in the SAME room as your living room or dining room. This is a great opportunity to add an accent color and personality and REFINE your entryway, especially if you don’t have a defined entryway.
-
If you have a back door (not including a sliding door) that leads out to your garden/backyard and is located in a major room (kitchen/family room/dining/etc…)
-
If you have a pantry door in your kitchen that stands out in comparison to your cupboards (ie: you have espresso or wood cabinets and a white pantry door or white surround with a glass insert). Painting your pantry door will reduce the level of contrast in your space which will add to the flow and overall appeal OR it will add visual interest if you have all white cabinets/trims/doors.
To read more about the best paint colors for your front door, check out this post… The Best Paint Colours for the INSIDE of your Front Door
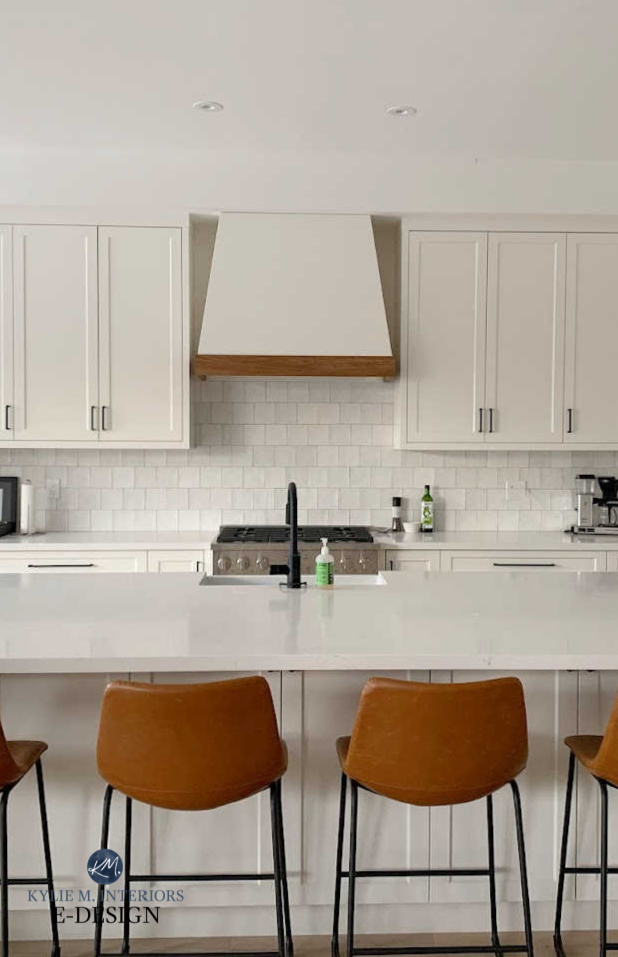
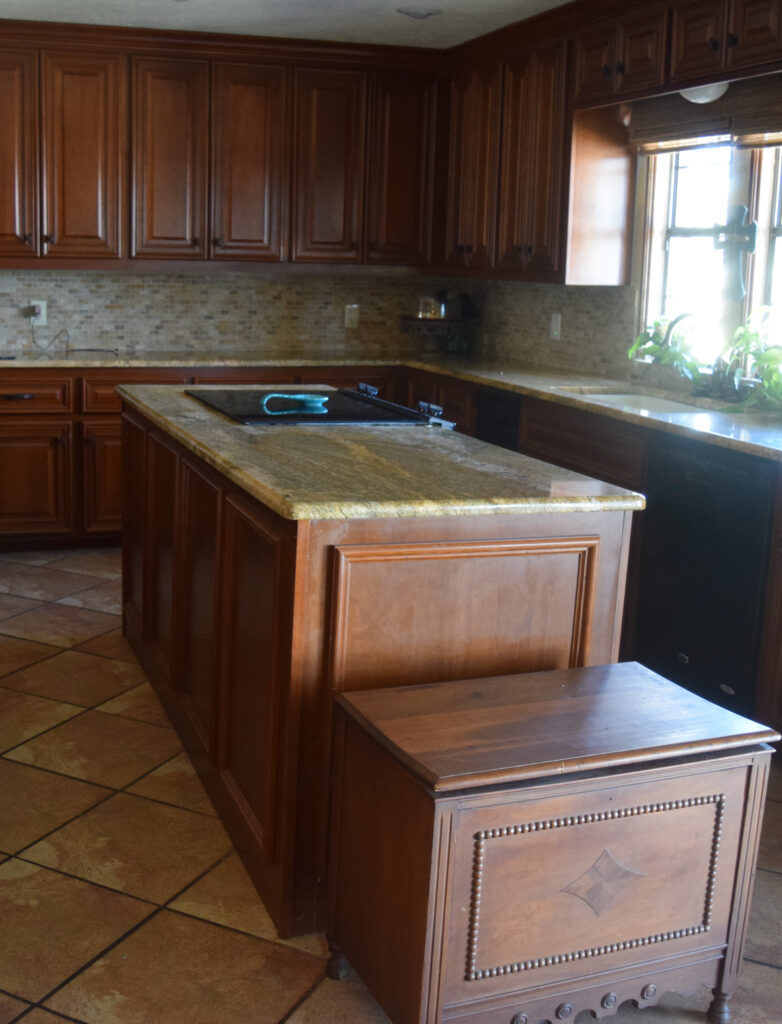
5. UPDATE YOUR BACKSPLASH
If your home is outdated, I bet the backsplash is one of the main culprits. And while painting kitchen cabinets and replacing counters isn’t for the faint of heart, installing a new backsplash is a great project for the average, moderately handy DIY lover.
While there’s a LOT of wood-on-wood in this next kitchen, the new, creamy subway tile backsplash coordinates with the older-style granite and updates the space to be the best it can be ‘for now’.
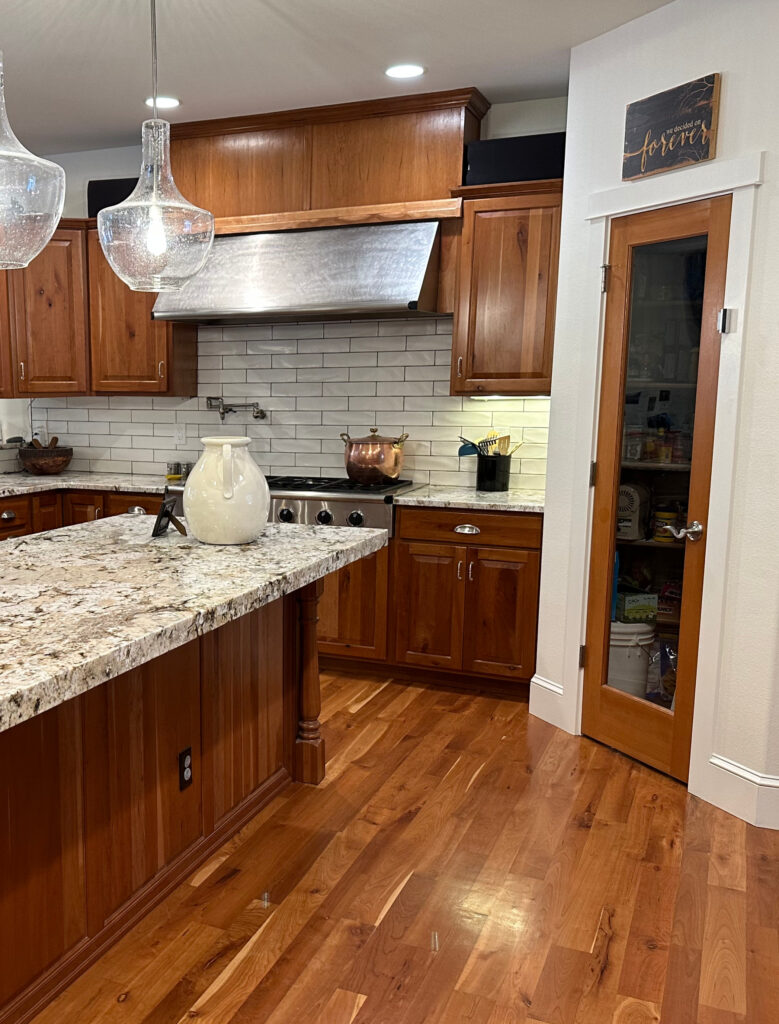
The cool thing is that the long-term plan included painting the cabinets, to give some relief to all of the wood and lighten and brighten the space. And because the backsplash was wall chosen for the space, it stayed in place…
How to Get the Look of Marble Without The High Price
To start, think long-term…
1. Will you be replacing your countertop at any time soon (eg. a year or two)? If so, pick the countertop you love and tuck it in your back pocket for now. Find a backsplash that coordinates with this and ‘hopefully’ coordinates with your existing countertop and cabinets. If there isn’t one, hold off on the backsplash idea and look at other updates.
Or, consider painting over your existing backsplash as an easy DIY, short-term solution. Then, when the budget allows for replacing the countertop with a trendy white quartz or affordable laminate AND backsplash, you can coordinate them at the same time.
The Best Bougie Countertops on a Budget
My next client painted her 4×4 boring beige tile backsplash to look like trendy Zellige tiles and saved a BUTTload of money…
2. Do your research on what’s trendy and what’s timeless. Again, I’ve got blog posts comin’ out of the wazoo and have covered this topic for you here.
6. PAINT YOUR WALLS THE RIGHT COLOR
Paint is one of THE least expensive ways to change your space and one of the most effective home improvement ideas! On a small scale, you can choose to do a feature wall or nook. On a larger scale – the whole shebang!
However, painting your whole home can seem daunting, which is why it’s important to focus on your 5 KEY ROOMS first and then work out from there…
1. MAIN LIVING AREA
2. KITCHEN
3. PRIMARY BEDROOM
4. MAIN BATHROOM
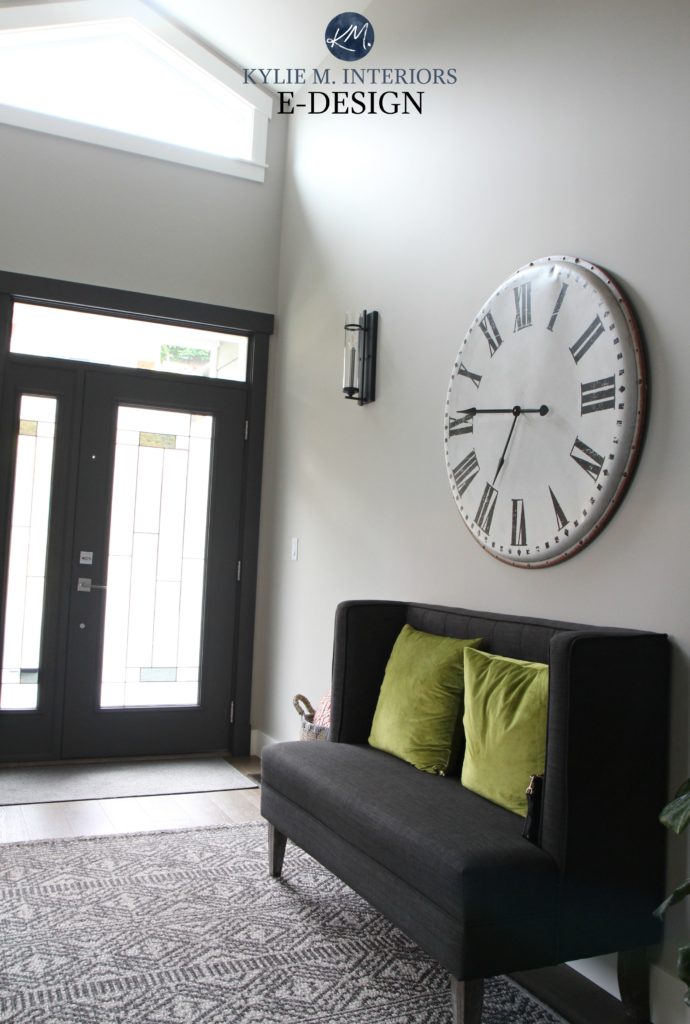
5. ENTRYWAY

The Best Medium to Dark Green Paint Colors
HOW TO CHOOSE THE BEST PAINT COLOR?
Okay seriously, that’s an entire book unto itself. Color is VITAL to the aesthetic and emotional health of you and your home, and any choice should not be made lightly!
Look at this next living room. Sure, we changed the decor and furnishings, but it’s the change in PAINT COLOR that makes the biggest difference…
Paint Color Review of Benjamin Moore Edgecomb Gray
If you need help with choosing a new paint color, I’m here for you and have DOZENS of blog posts related to paint color, for example:
- The Best Gray and Greige Paint Colours
- The Best Neutral Tan Paint Colours
- The 5 Best Off-White Paint Colours
And many more. Type in one or two words to the SEARCH and I bet you’ll find what you need!
7. GET RID OF ANY BOOBY LIGHTS!
Booby lights are the bane of my existence (admittedly, I have many banes). In fact, I wrote an entire blog post on this as I’m so passionate about it (no pun intended with the boobs reference).
Boob lights instantly advertise the age of your home and are one of the LEAST expensive updates – so why not change ’em!
My favorite transitional light fixture is this one…
And it’s hard to beat the price! Click HERE
Is it thrilling and exciting and beautiful?
HELLS no, but when the budget doesn’t allow for the above, sometimes ‘better than what’s there’ is a great way to move forward, especially in hallways, closets, and secondary bedrooms – common locations for ye ole booby light.
Want to read more about boobs? Well, you’ve got the wrong site! Want to read more about updating booby lights? Check out this blog post… Budget-Friendly Lighting Updates
Check out this next kitchen to see a super budget-friendly update…
SAME FLOOR, SAME BACKSPLASH, SAME GRANITE COUNTERTOPS – new paint color on the cabinets and walls and new light fixtures…
Before & After Painted Kitchen Cabinet Projects
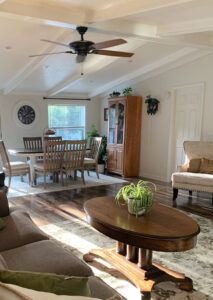
8. REPLACE OLD WINDOW TREATMENTS
Whether you have janky old aluminum blinds or worn-out, thread-bare curtains, updating your window coverings is a great way to shed new light on your home.
One of the most affordable ways to update your window coverings is drapes. Thanks to Amazon and Wayfair, tossing up a drapery rod and a few sets of drapes is more affordable than the average, well-made blind. Suuuuure, Amazon has affordable blinds, but I wouldn’t expect them to last a long time compared to custom-order pieces.
Most rooms with 9’+ ceilings will need drapes approx. 108″ long to hang at the right height. While you might need to do a bit of hemming (you can even do iron-on hem) this gives you the space to get your drapes hung at their best spot.
Drapes also soften a space, particularly those with a lot of hard surfaces (eg. tile/hardwood flooring/counters), and add coziness to almost any room.

A FEW THINGS TO CONSIDER
- The metal finish of your drapery rod should coordinate with your main hardware finish.
- Hang your drapes at the right height – which is probably higher than you think it needs to be. If you hang your curtains right above the window trim, your window looks smaller and your walls look shorter. While this is necessary in some rooms due to wall/window size, many rooms can accommodate a rod hung closer to the ceiling line.
- Unless you have a small window or extra wide drapery panel, most windows need two drapes per side.
- Avoid patterns, stick with neutrals.
- If you want to update with blinds, cellular blinds are the most popular choice – particularly ones with the ‘top-down bottom-up’ feature.
And lastly, a little cost-free bonus…
4 QUICK IDEAS TO ADD VALUE TO A HOME WITH NO MONEY
Okay, if you’re not spending any money, you must know these ideas are pretty straightforward. However, sometimes it’s the easiest, most obvious ideas that make the biggest impact!
1. DECLUTTER. Whether your home is new and updated or old and outdated, nothing makes a home look bad like clutter. Take everything out of your room (as much as you can) and start adding back pieces one at a time. You might be surprised at what doesn’t make the cut and how GOOD your room feels – less is often more!
2. WIPE DOWN BASEBOARDS, TRIMS, & DOORS. If you don’t have the budget or energy to repaint, give all of your trims and doors a good wipe-down. Cleaning those ledges and edges makes a HUGE difference in how good a home looks.
3. CLEAN OUT YOUR WINDOW SASHES. If you have older windows and there’s dirt, mold, or build-up in the nooks and crannies, get out a scrub brush, cloth, and some bleach. Old, but clean windows are more appealing than old ones that look like they’re rotting from the inside out.
4. CLEAR OFF WINDOW SILLS. Your window sills should have absolutely nothing on them. Items on window sills visually shrink a space and block the quality of light coming in. They also make a space look janky and undecorated.
5. CLEAN, CLEAN, CLEAN. A little sweat equity and elbow grease (or blood, sweat, and beers) goes a long way to a home looking and feeling its best. Start in one room, at the TOP of the room, and work your way down to the floor.
You’ll also find my HOME STAGING blog posts helpful, as they follow similar principles.
Well, that’s it, my funny friends. If I’d done the Top 50 I’d be about 10 bottles in and flat on my face at this point, so ‘cheers’ to moderation!
READ MORE UPDATE IDEAS
Bathroom Update Ideas: High-End Look, Low-End Price
6 Ideas to Update Your KITCHEN On a Budget
How to Add Curb Appeal to the Exterior of Your Home
The New Era of Laminate Countertops and Why They Rock
Get the Online Paint Color & Update Expert that Designers Hire!

Chat soon,

Article originally written in 2016, awesomely updated in 2023
Comments
Leave a Reply
More Posts
The Best Pink & Blush Inspired Paint Colors: Muted, Dusky, & Soft
The Top Moody Shades of Pink Previously, I wrote about the best pink paint colors—those with a bit more color and intention. While those will satisfy some of you, others
Read More
The 5 Best Creamy White or Off-White Paint Colors
THE ELUSIVE ‘CREAMY WHITE NEUTRAL’ When it comes to light, warm neutrals, it’s all in the undertones. And other than pink and green, yellow is the undertone many of my
Read More
The 8 Best Warm Neutral Paint Colors With NO Yellow Undertones!
The Top Light Depth, Warm Colors That Aren’t Cream! When choosing the best warm neutral paint color for your home, whether creamy white, beige, taupe, or greige, your choices are
Read More

Hi Kylie. I am a big fan! We built our house in 2018 just before the more over-sized cabinet door handles became very mainstream and now I’m stuck with a 5 year old kitchen with small cabinet pulls. It’s not feasible to repaint the cabinets and fill the holes to start over. I had looked into the adjustable handles that you mention in this post but do not recommend. Can you elaborate on why you are so opposed to them? Thanks!
Author
Hey Amy! I’m thinking you’re referring to the handles that have ends that extend beyond where they bolt into the doors. I have them in my bathroom and CURSE them daily as I catch my pockets/hair dryer cord/etc. on them. I also find that they look cluttery, like the extended bits don’t belong and they’re too busy looking. They’re also about 5 years out of date. I mean, there are people who LOVE them, so if you do, it’s all good, but I’m not a huge fan ;).
I came away from this post with so many beneficial recommendations. For me the most significant take away was that I can achieve a huge change in the aesthetics and look of my home for not a whole lot of money. It is amazing that a change in paint color can completely change the look of a room. Other small changes like switching out cabinet hardware and light fixtures can go a long way in updating the look of a room. And never, ever underestimate the effects of decluttering and cleaning. Incorporating all of these suggestions would have my home looking like an entirely new place. I’m excited to incorporate some of these suggestions!
We recently built a home with various painted cabinets as well as stained cabinets. We love the Top Knobs Ash Gray Ascendra color on the painted as well as the stained cabinets. They are a bit pricey, but beautiful and blend with so many different finishes.
Curtain rods that hump. (I knew that would get your attention!) For very large windows, the curtain rods sag in the middle even with a middle support. The rods are also two different diameter and this also contributes to a saggy look. In decorating photos the curtain rods look straight, but I just can’t get my curtain rods to be straight. Any suggestion?
Love these simple ideas. I’d like to change my cabinet pulls and knobs, but the sur rent ones include a square “faceplate” on each side of the pull that leaves an brown shadow on the hickory cabinets when I replace them with a black pull. Is there a solution. (My husband will not paint the hickory cabinets)