Affordable Ideas to Update Your Outdated 1990s Bathroom
How to Modernize an Outdated 90s Bathroom
After my blog posts on updating 1980s, 1990s, and 2000s kitchens, I got tons of requests for the same series on bathrooms – ASK, AND YE SHALL RECEIVE!
And talking about asking and receiving, on Instagram, I asked for your outdated bathrooms from previous decades and you DELIVERED – thank you! In fact, it was hard to choose which bathrooms would make the best update examples. Once I narrowed it down, I decided to start with 1990s bathrooms, as a) I’ve already done a blog post on 2000s loos, (which I will be adding more to, shortly) and b) 90s bathrooms are the ones showing up most often in my inbox.

Here’s what I decided on for my boundaries (of which I have few in real life)…
- These bathrooms need to have moderate mass appeal or should seem familiar to the average 90s bathroom homeowner. Anything ‘too out there‘ is hard to use as it relates to too few homeowners.
- They also need to be a contenders for ‘moderate, but not over-the-top updates‘. The thing is, anyone can blow up a bathroom and start from scratch (I’ve blown up a few toilets, myself); it’s a WHOLE different party to use most of what you have and still make it look better than it did.
Now, let’s all cut our hair in the ‘Rachel’ style, put on some high-waisted Mom jeans (which are trendy again, btw), and take a little stroll through a 90s bathroom…
BATHROOM DESIGN IN THE 1990s
Bathrooms built or renovated in the 90s are pretty easy to spot…
- Wood cabinets, usually oak or maple – often with raised panel or cathedral-style doors.
- Tons of beige tile with an overload of orange and brown tones.
- Forest green or teal and burgundy color palette.
- Plenty of pink and dusty rose.
- 12×12 tile, although 8×8 pops up here and there.
- Linoleum or sheet vinyl flooring with a white backdrop and some type of detail/pattern (often with forest green and burgundy).
- Thermfoil cabinets that are likely peeling by now.
- You’ll often find carpet in the main bathroom area (but thank God, not around the toilet).
- A BUTTLOAD of brass/gold hardware (faucets/cabinet hardware/lighting). Fun fact – did you know that in the snobby wine world, wine is measured in buttloads? See – I’m classy like that.
- Where there’s no brass, there’s chrome. The two are also mixed quite often.
- TONS of soaker bathtubs with tile deck surrounds.
- Wood trims.
- Non-white tubs, toilets, and sinks. This includes forest green, burgundy, taupe, as well as bone/almond that was carried through from the 1980s.
- Shell-shaped sinks, as well as countertops and sinks that are all one piece and usually have a kind of creamy-beige marbled finish (again, thank you 1980).
- Strangely low toilets that you don’t know are low until you sit on one that’s newer and taller.
- Hollywood-style light bars.
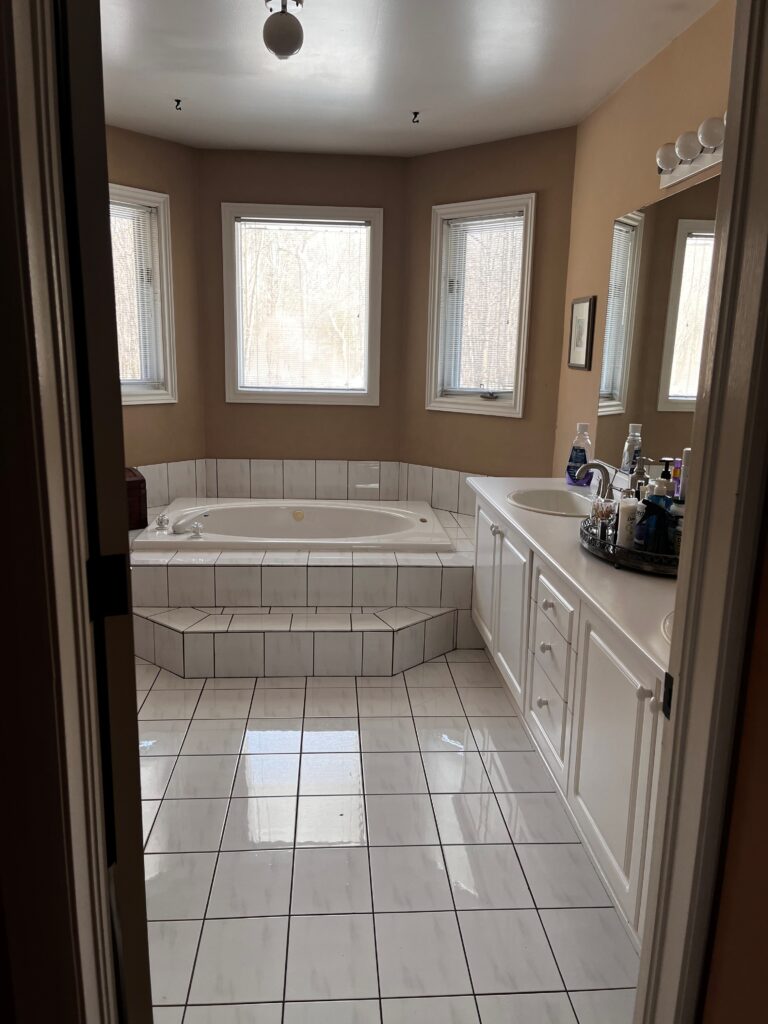
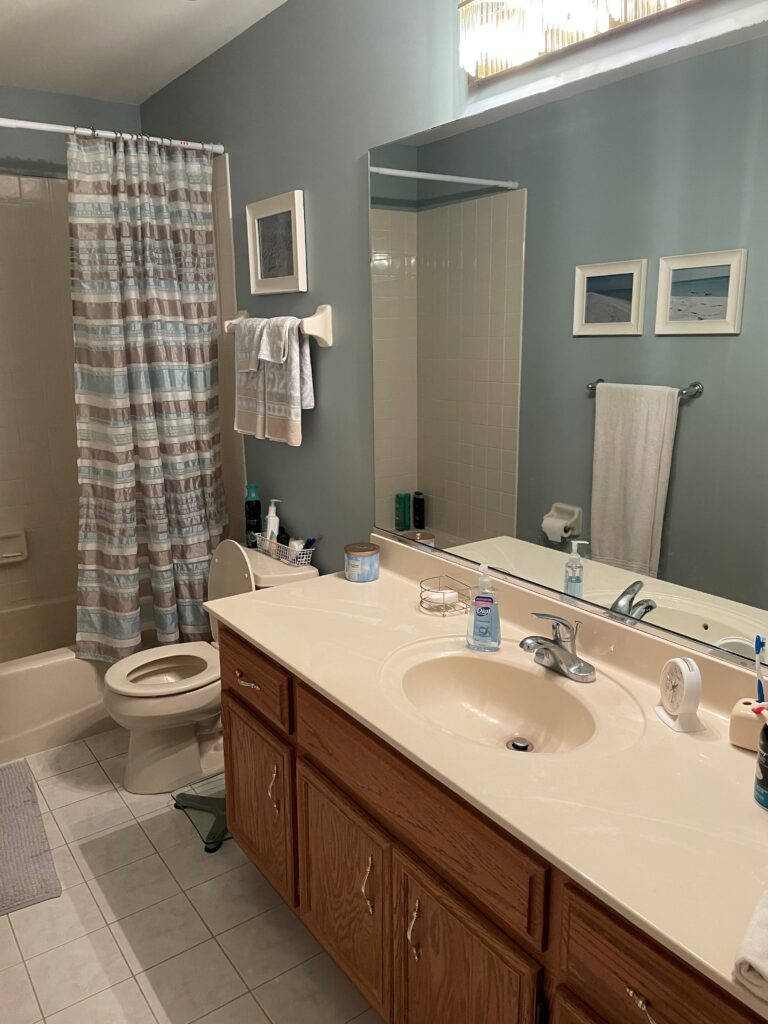
I could go on. Instead, check out this bad boy who’s screamin’ ’90s…
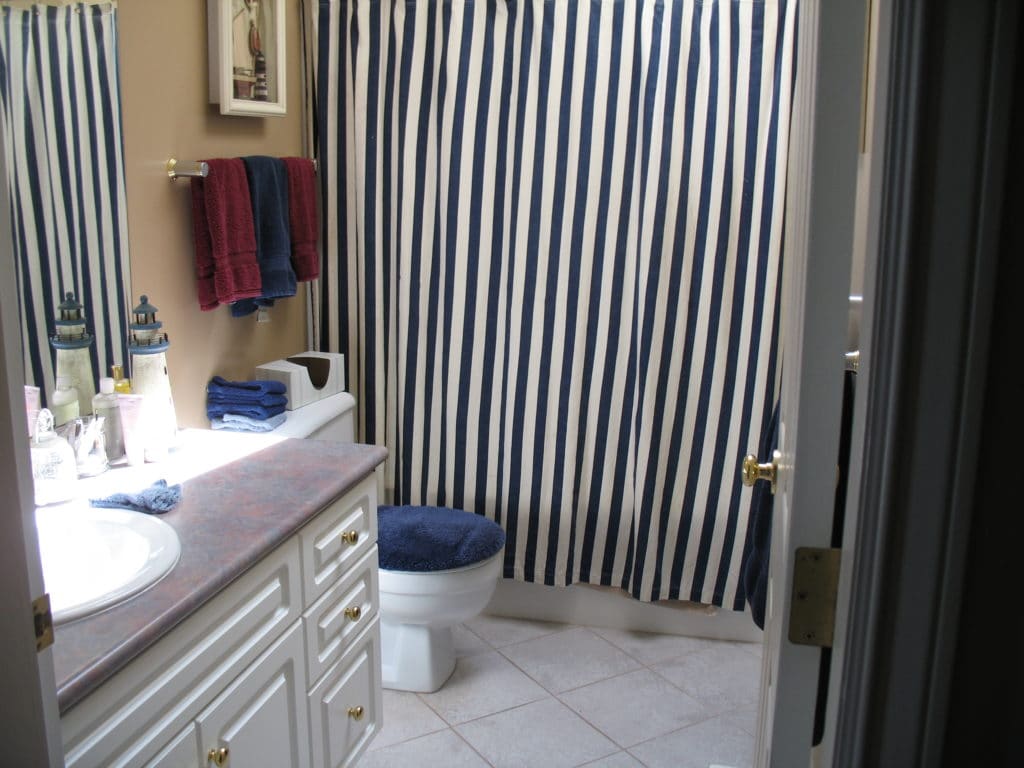
In my previous life, I did tons of Home Staging. The above bathroom is one I worked on in the 2000s. Clearly, this is the ‘before staging’ photo. Sadly, I can’t find the after, but it’s still a great specimen.
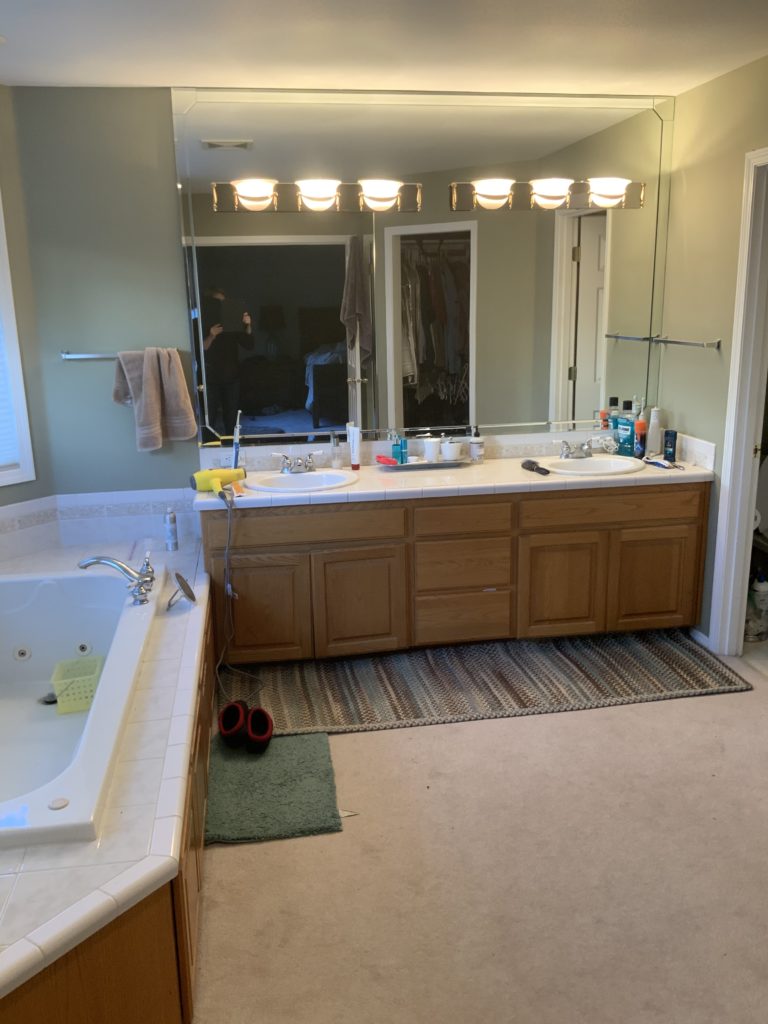
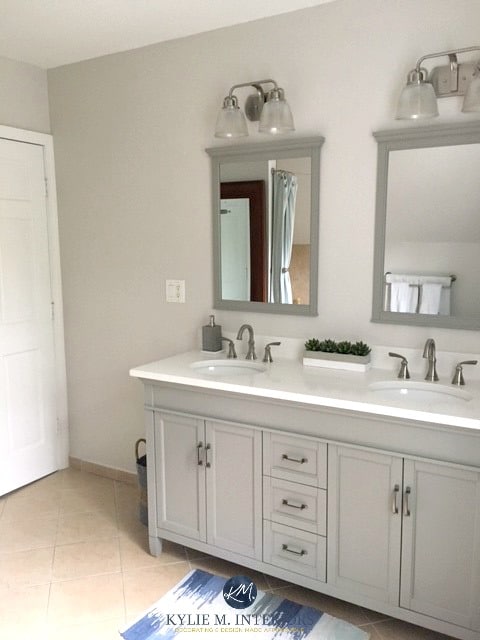
Here’s another beauty of a 90s primary (previously referred to as ‘master’) bathroom…
So, now that we’ve seen some examples, let’s see what I’ve got up my colorful little sleeves…
1. PAINT YOUR VANITY
Painting your cabinetry is one of the easiest, most affordable ways to update your bathroom – and it’s DIY-friendly!
However, the typical 1990s bathroom is fussy about its color partners.
Check out this next bathroom from the 90s and how it was updated on a budget, starting with the vanity…
- The vanity is painted a wicked dark greige paint color.
- New cabinet hardware.
- Chrome faucet in a new style and coordinating light fixture.
- Updated mirror, but nothing so modern that it seems out of place.
Guess what’s STILL THERE?
- The original countertop (luckily it’s fab).
- 12×12, 90s floor tile in a slightly pinkish off-white.
- 6×6 off-pink ceramic tile around the tub.
- The original vanity.
ALL OF THE EXPENSIVE FINISHES STAYED PUT!
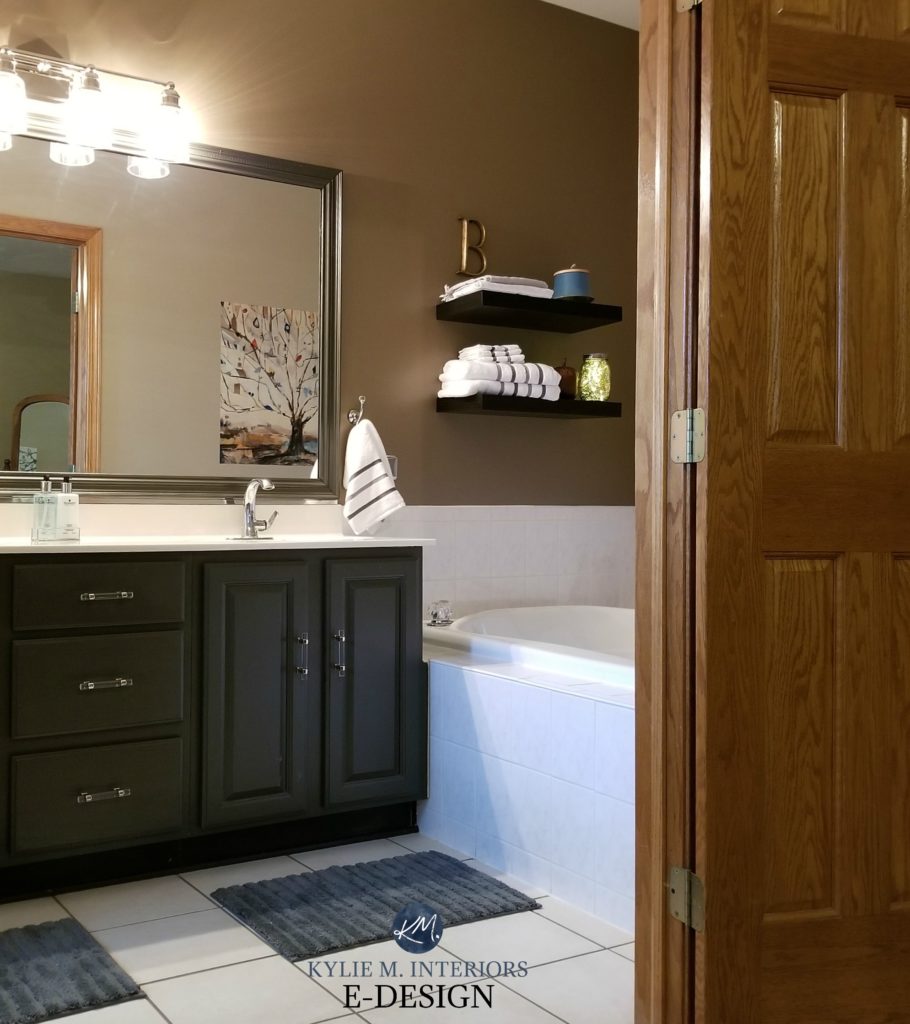
How about the travertine in this next bathroom – look familiar?
This travertine tile winks at the 2000s, but the tile size and details, light fixture, faucet, and door hardware are alllll 90s. However, it’s a relatively easy update if you’re good with a ‘happy medium’.
While keeping the big bones, including the vanity, linen tower, countertop, and tile floor, a few budget-friendly changes make this bathroom look so much better…
- The homeowner painted the vanity a glorious shade of blue-green-gray (Benjamin Moore Kitty Gray).
- New door hardware (I’d love it if all the hardware in this space were nickel, but if black is throughout the home, I get why it’s there).
- New cabinet hardware along with a curved faucet (that you can just see the edge of).
Check out this next ’90s beauty…
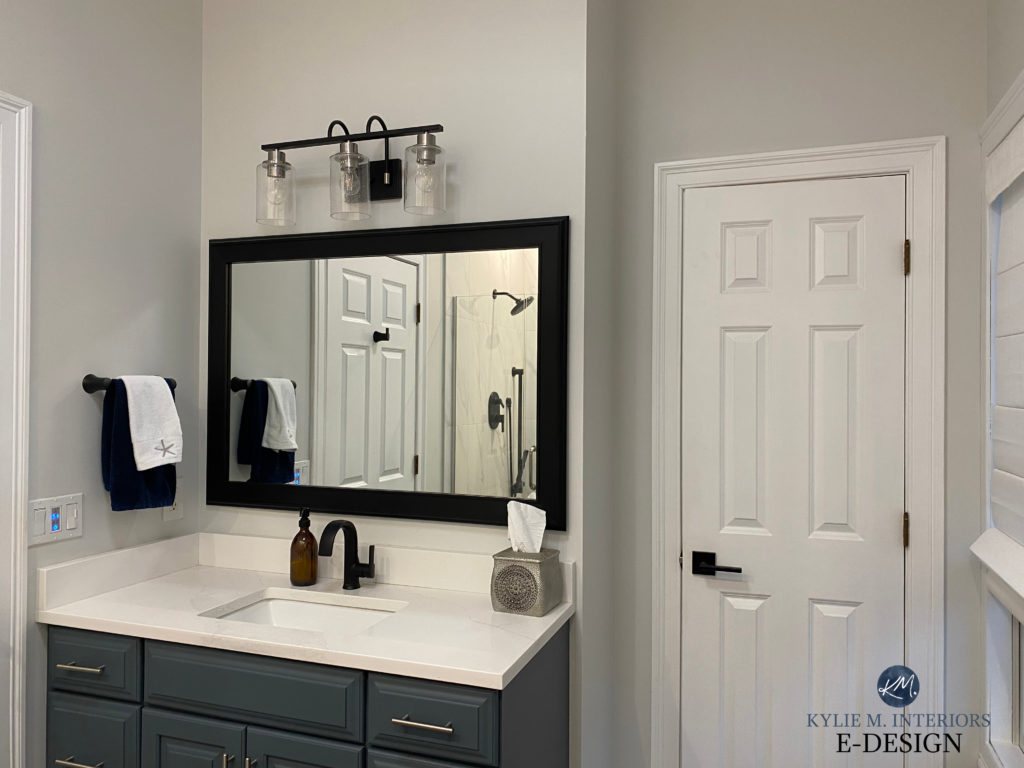
Walls, Benjamin Moore Moonshine. Vanity, Sherwin Williams Grays Harbor
Sure, there’s a new quartz countertop, but at 42″, the replacement cost is manageable compared to a full gut-job. Notice the following…
- The shape of the faucet is coordinated with the curves of the light fixture.
- The door hardware is updated.
- Cabinet hardware is updated (although those handles are the bane of my existence as I constantly catch myself on them).
- The walls are painted a subtle shade of gray.
- Freshly painted vanity (best vanity colors).
And while I might lighten up the look of the mirror, overall, this space is PERFECT!
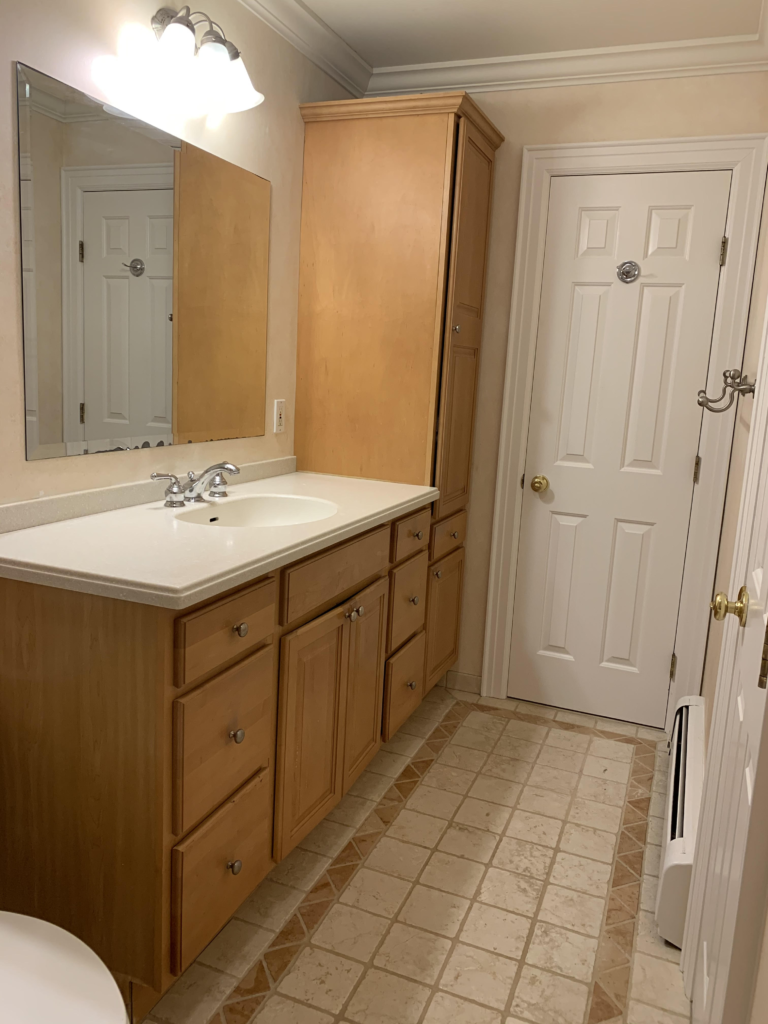
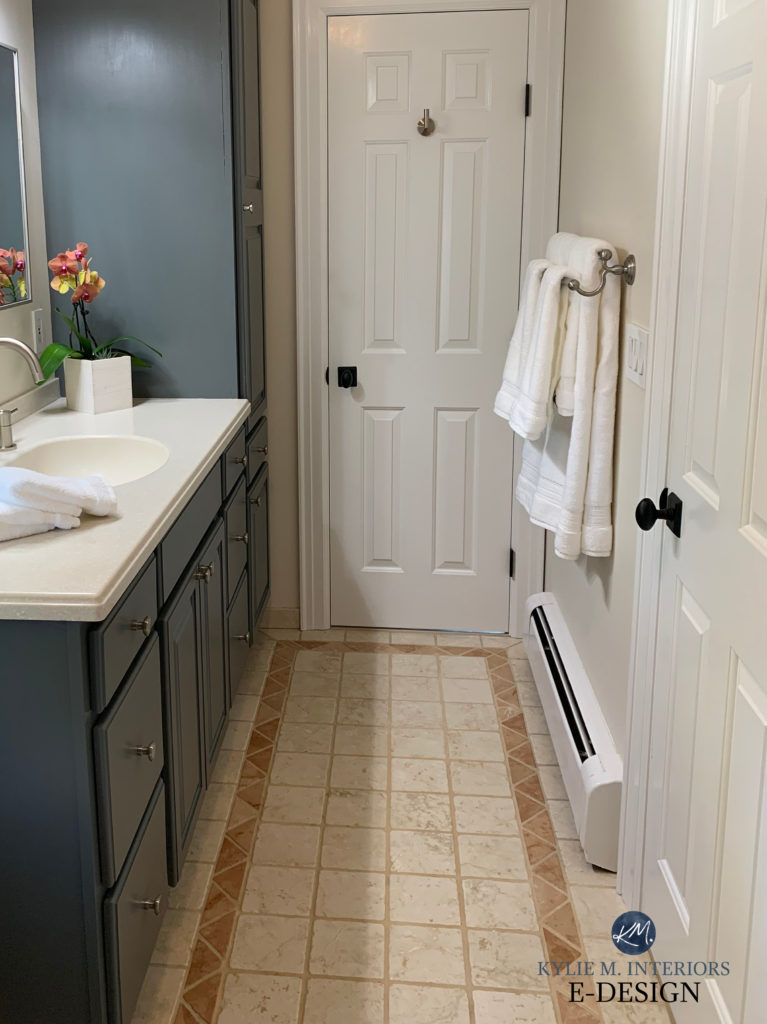
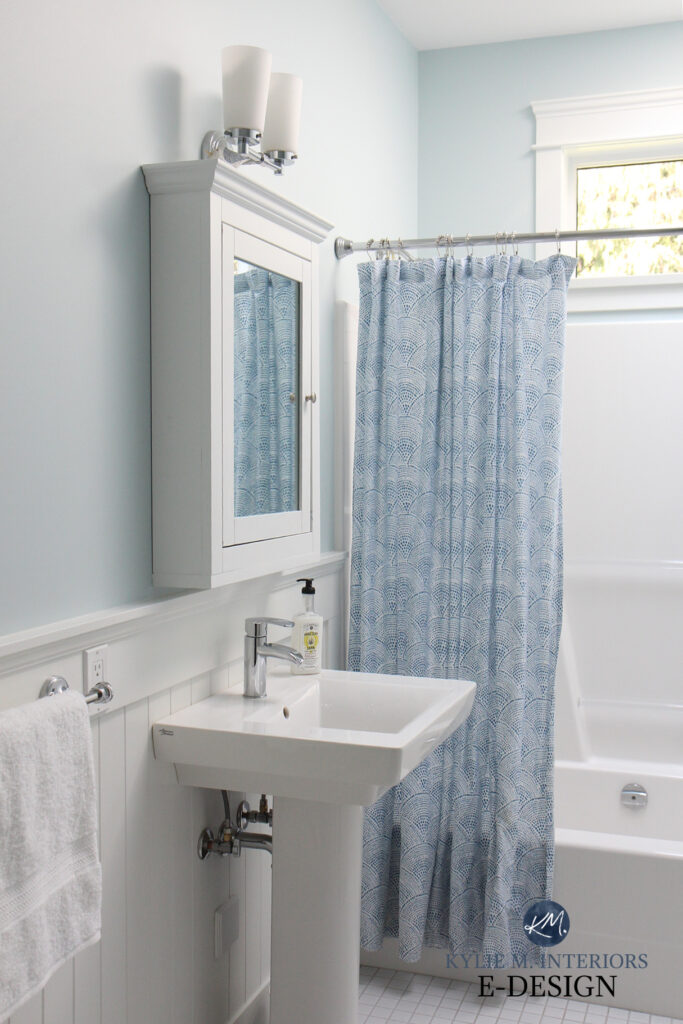
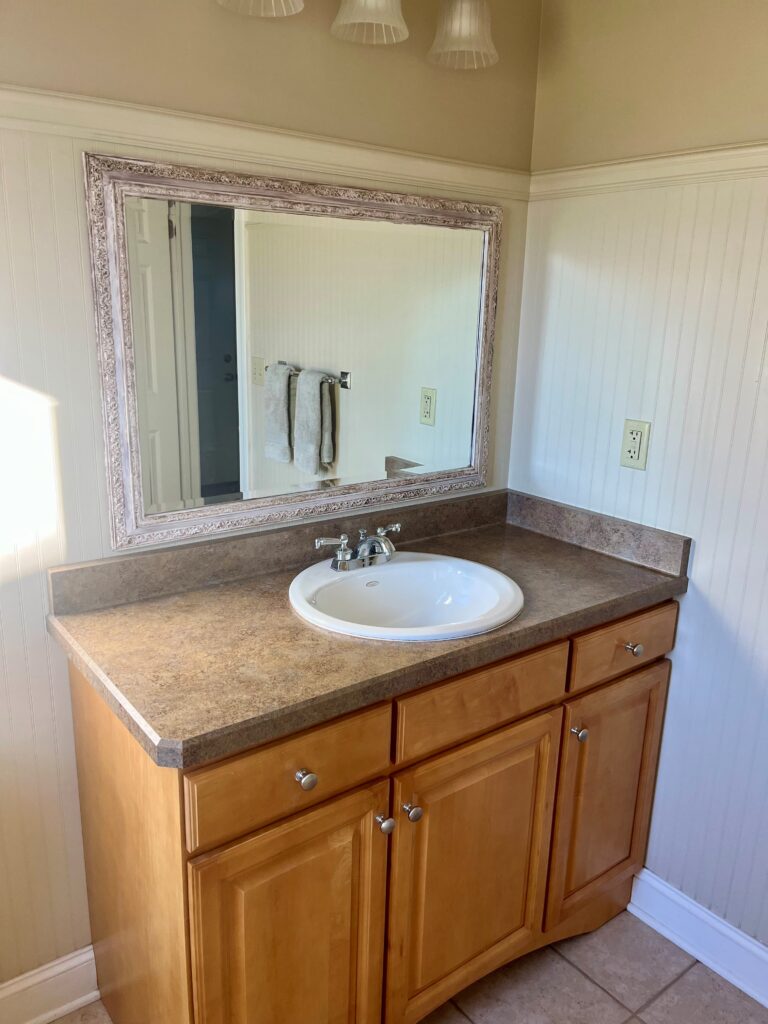
This next bathroom has its original ’90s beige tile floor…
The hardware, lighting, and cabinet hardware are AWESOMELY coordinated in finish and style.
From there, we chose the perfect paint color for the walls, bringing the gray of the vanity and the beige of the tile floor together.
But you can’t go throwing any ole color on your 90s vanity or you’ll lose your sanity…
THE BEST VANITY COLORS FOR A 1990s BATHROOM
Whereas bathrooms built or remodeled in the 2000s often cater to warmer tones, many 90s bathrooms prefer the cooler end of things, including…
- Darker shades of blue (COLOR BUNDLE HERE for easy sampling and comparison).
- Medium to dark green paint colors (COLOR BUNDLE HERE).
- Medium to dark shades of gray (COLOR BUNDLE HERE & HERE).
- Some blue-green-gray blends.
A color bundle is a group of 4-6 curated colors within a certain color group – the best colors for comparing.
I’m lucky to have Samplize let me create this (I have connections, baby).
Back to bathrooms, remember, anyone can demolish a bathroom and create a beautiful one from scratch (or hire a professional to do it for them)…
These update-related blog posts are about affordable, budget-friendly ideas that KEEP some of the existing finishes & layouts.
2. PAINT YOUR WALLS THE RIGHT COLOR
This might seem obvious, but it’s amazing how many well-intentioned bathrooms are painted the wrong color. Is the right paint color going to save your bathroom? Not entirely, but it’s a step in the right direction, whereas the wrong color BACKdates your bathroom.
This next bathroom is a little gem…
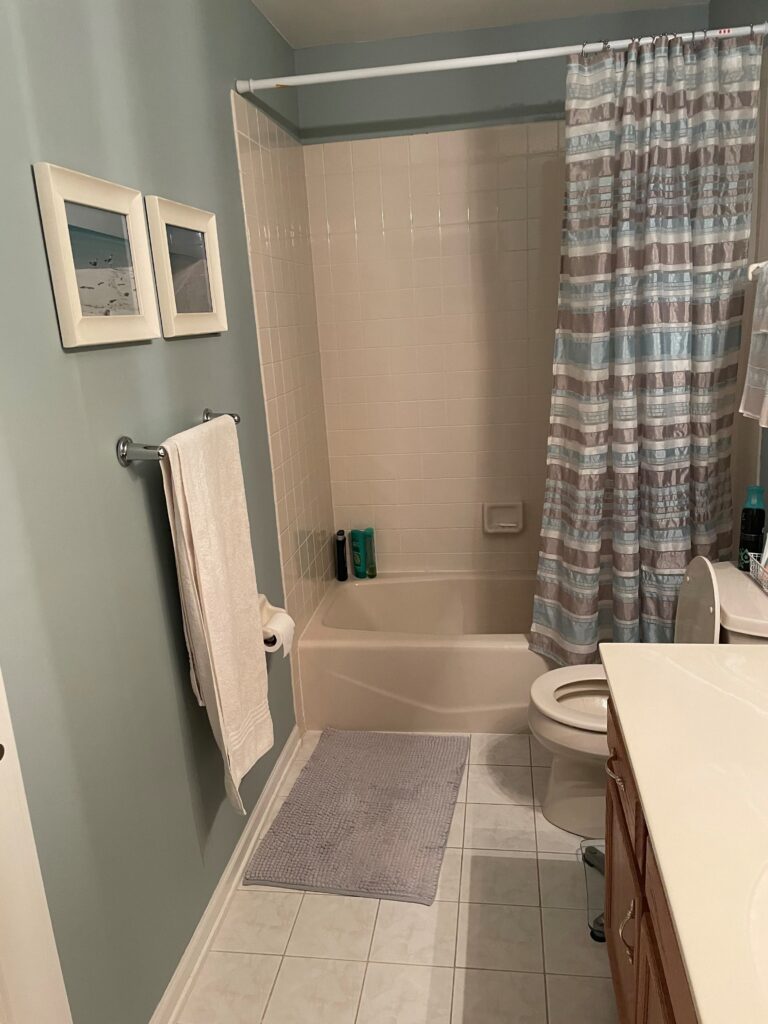
While the taupe/mauve tub, shower surround, and toilet aren’t ‘modern’, they’re well-coordinated with each other and with the tile floor. The wall color is a pretty contrast to the fixtures, however, it ‘accents’ them, which isn’t always the goal when dealing with a non-traditional fixture color. Instead, I’d be more inclined to lean into the fixtures and their undertones.
LET’S SAVE SOME MONEY, BABY!
- Paint the walls a light, subtle shade of taupe – likely off-white, but maybe light depth.
- Paint the vanity a color that coordinates with the existing, permanent finishes. I’d be most tempted by a darker shade of taupe to ground the space.
Here’s a curated bundle of my FAVORITE off-white & light shades of taupe for sampling and comparing.
3. INSTALL A NICE SHOWER ROD – CURVED OR STRAIGHT
Whether you like it slightly curved or straight (wink wink), almost EVERY 1990s bathroom can do with a shower rod update. Personally, I only use curved, hotel-style shower rods as they add style to a bathroom and extra elbow room in the shower. I also like them screwed permanently into the wall versus tension, but that’s a personal thing.
While it’s hard to see the real curve, this cute little bathroom has a curved shower rod…
Benjamin Moore White Dove & Sherwin Williams Ripe Olive
The straight rod in this next bathroom is ‘fine’, but a curved one would look so much more bougie!
Benjamin Moore Ocean Air
Let’s look back at a previous bathroom…
Along with a new wall color, paint color, and some hardware (chrome), I’d install a curved shower rod (chrome) and a shower curtain that has varying shades of taupe in it.
To get the above homeowner started or to get your creative juices flowing – this Boho Farmhouse Shower Curtain is wicked pretty. This one is equally as pretty and suited to this room. It’s a small bathroom and a tone-on-tone palette will look great!
Kylie’s 3 Fave Curved/Hotel-Style Shower Rods
- The Pretty Home curved, adjustable shower rod has great reviews and a great-looking finish (and price!).
- I love the Moen name brand and the looks of their curved shower rod.
- The curve of this Bath Bliss curved shower rod makes me ALL kinds of happy. Again, GREAT reviews.
4 CASE STUDIES: Update Your 1990s Bathroom (also linked at the end of this blog post)
4. UPDATE HARDWARE, FAUCETS, & LIGHT FIXTURES
If there’s one thing that gives a 90s bathroom’s age away, it’s its fine lines, wrinkles, and metal finishes.
Now, I know that between sink faucets, shower head, tub faucet, lighting, cabinet hardware, and towel racks, doing the whole shebang can be friggin’ expensive. If you have the budget to do it all – awesome possum, but if need a happy medium for now, close your shower off with a shower curtain and focus on the finishes and fixtures in the remaining space.
But what finishes are trendy?
Can you mix and match metal finishes?
To find out these details, read THIS, then come back to see how we jazz up this next little loo!
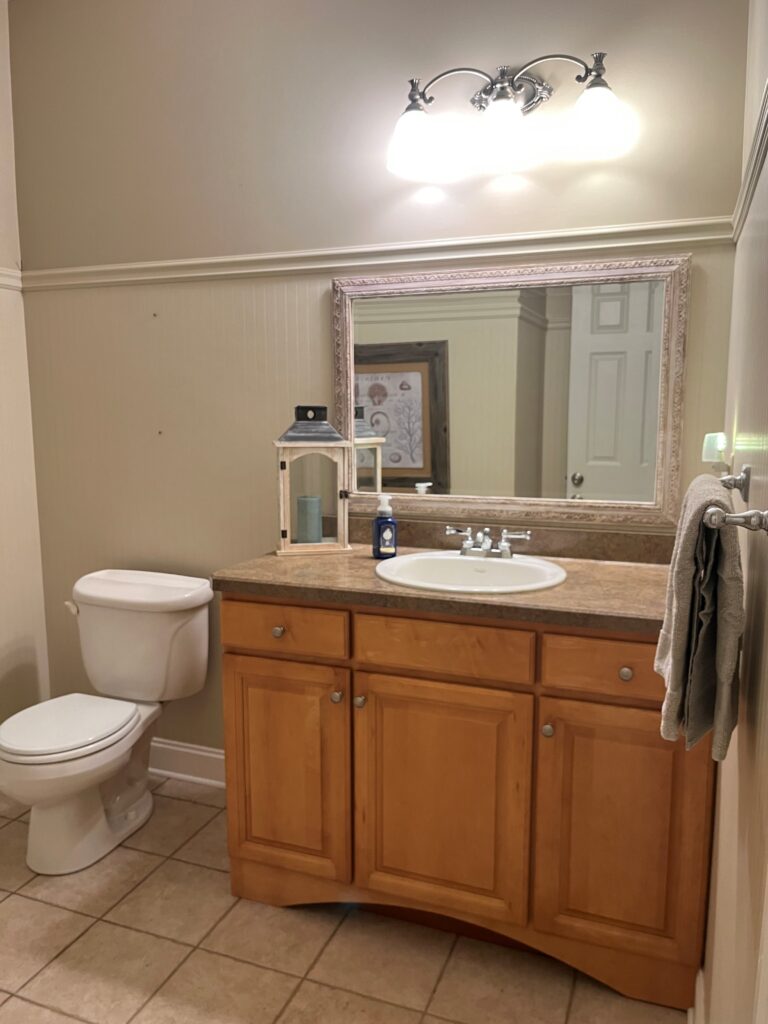
Using the previous three tips, along with some guidance on metal finishes, let’s see what we can do in this space…
FIRST UP, FIXTURES
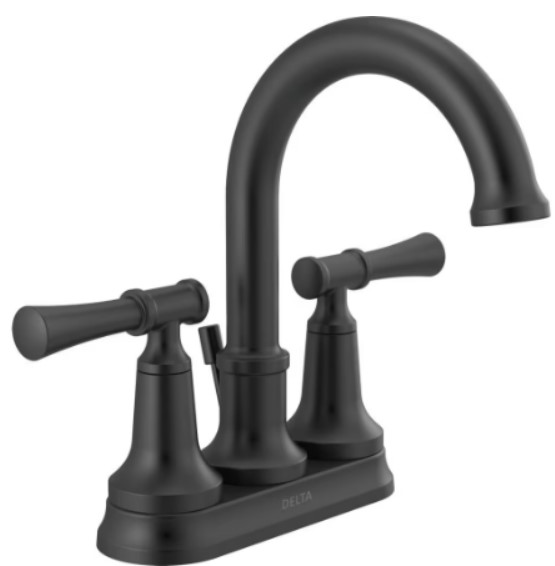
With not having a shower, it’s easier to focus on the vanity area. Knowing in my head where I’m heading with the color palette (which we’ll talk about shortly), I’d look at black or antique brass for any hardware or metal finishes. As for style, with the beadboard being a bit more homey, a faucet with a bit of styling is nice versus a modern, uber-clean-lined piece.
If the sink were changed to accommodate an 8″ spread, I love this faucet. However, with the current sink, I’d look at this wee beastie…
In a small bathroom, the little details are the big details!
From there, the lines of the light fixture must pick up on the faucet…
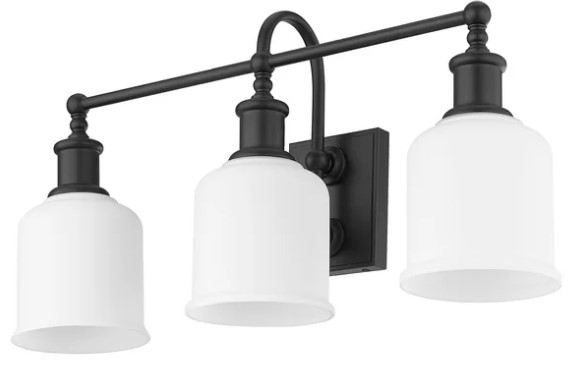
The styling of the light and faucet suit the slightly old-school/country vibe of the beadboard. If it were wainscoting or board and batten, we’d explore different styles!
Lastly, add some round knobs to the vanity, grab some new towel rods, and start thinking about PAINT!
NEXT, LET’S PAINT THE VANITY…or not
Normally, I might paint the vanity in a bathroom like this. However, because there’s beadboard (amazeballs), leaving the vanity wood could work. In modern remodels/builds, there’s often a stained wood vanity with painted wainscoting (or beadboard). Sure, today’s wood cabinets aren’t this orange-toned, but when ‘working with what you’ve got’, keeping some of what you have can be a great solution.
This being said, the vanity could also be painted. I would aim for an off-white shade of beige as white is too stark for this space.
By the way, if you have a bathroom without personality, adding beadboard, wainscoting, or board and batten is a great way to jazz things up!
Whether the vanity is painted or kept wood, I’d paint the beadboard and ALL trims (including the inside of the door) the same color. And because beige tile usually favors green over blue, I’d hit up a lovely earthy green hue like Sherwin Williams Cast Iron. This won’t just complement the beige tile floor, but the countertop, too.
Here’s the basic inspiration behind the above look (colors are tweaked for this bathroom).
While it will take a little DIY, I would take a wee saw and cut out the molding above the mirror. I’d purchase a vertical mirror and place it approx. 2-3 inches above the countertop ledge and 2-3 inches from the baseplate of the light.
LASTLY, TIME TO PAINT THE WALLS
This is where we need to lean into the warmth of the tile and the countertop and look at beige. But rather than choosing a janky old 90s beige, we’d look at one of the more modern shades of beige (on the ceiling, too). BEIGE COLOR BUNDLE HERE.
Remember, these ideas are about saving money by using what we have while adding some visual value where we can!
Well, as you know, I could go on and on…and on. But for the sake of ALL of our sanity, that’s all for today!
4 CASE STUDIES: UPDATING 1990S BATHROOMS
READ MORE
Ideas to Update Your 1990s Home: 5 PART SERIES
Ideas to Update Your 1990s Staircase
5 Ideas to Update Your 1990s Home
How to Update Your 1990s Kitchen
Get the Online Paint Color Expert that DESIGNERS hire!