
How to Decorate With Vignettes (Home Decor)
Decorating Tips & Ideas
‘A vig WHAT?’ you might ask. A vignette is essentially a small-scale decorative display full of your purdy and important things – please don’t ask me to pronounce it correctly. All I know is that it starts off sounding like vin, which also sounds like the French word for wine, so I’M IN!
There are many opportunities to create a beautiful vignette in your home, and I’m going to give you some tips/steps on how to add a beautiful display to your space!
STEP 1: CHOOSE A SPOT THAT NEEDS SOME INSPIRATION
Find a spot that you see every day, that needs a little decorative love, such as:
- side table
- console/sofa table
- inside corner of the kitchen countertop
- top of a buffet or dresser
- short or single-shelf
- coffee table
- accent table
- empty corner
Surfaces that aren’t good for vignettes (right now)…
- FULL-scale bookshelf displays
- fireplace mantel
- a long shelf or buffet/cabinet
- the top of a piano
- really, almost any surface longer than 4′
Why aren’t these surfaces contenders for a vignette?
They are, but they need MORE than one. And for now, we’re keeping things simple. When you’re ready to learn about larger-scale decorating, check out my blog post, How to Decorate a Bookshelf: 4 Easy Tips to Follow or How to Decorate a Fireplace Mantel
Let’s start off by looking at a gorgeous little corner vignette in my client’s bedroom…

Paint Colours: BM Collingwood and Escarpment
HOW MANY PIECES ARE IN A DECORATING VIGNETTE?
There can be MANY pieces in a vignette, but to keep things a bit more meat n’ potatoes, we’re sticking with odd numbers/lower ones like one, three, and five. Remember, these numbers are FLEXIBLE because multiple grouped items can ACT like one; for example, a stack of books is variable as you might have three books, but they ACT as one item.
Please note, I rely 99.9% on after photos from my E-Design clients, who aren’t always professional photographers but do allow me to share REAL homes with you guys, and I’m grateful for them!
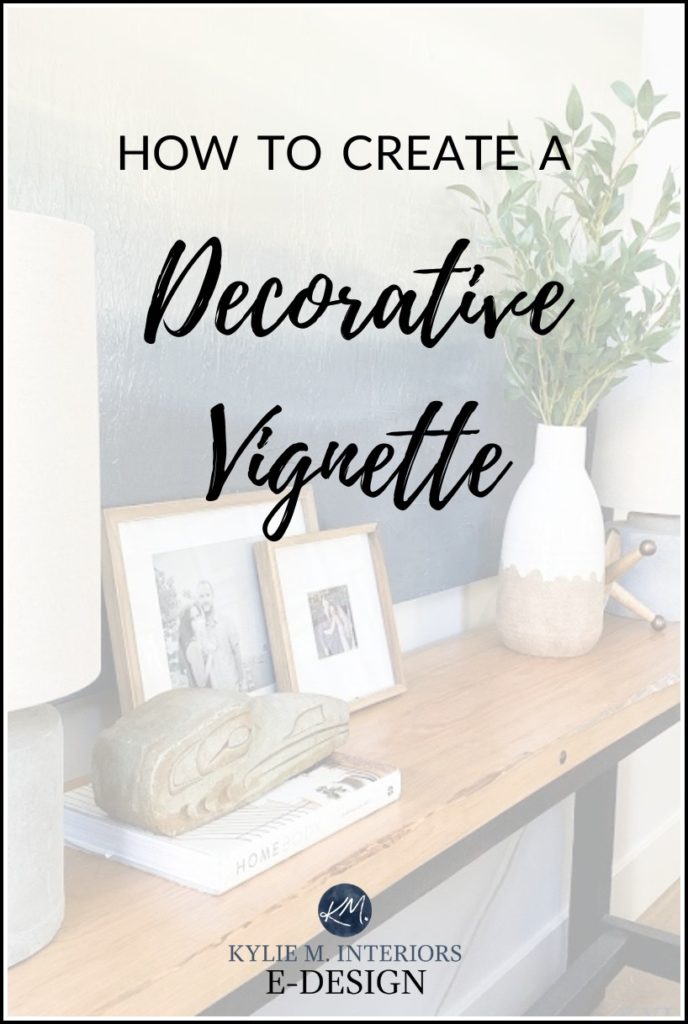
STEP 1: PLACE YOUR FOUNDATION PIECE FIRST
The FOUNDATION piece applies when creating a vignette with a wall space behind it.
If you DON’T have any wall space behind your flat surface, you can move on to Step 2!
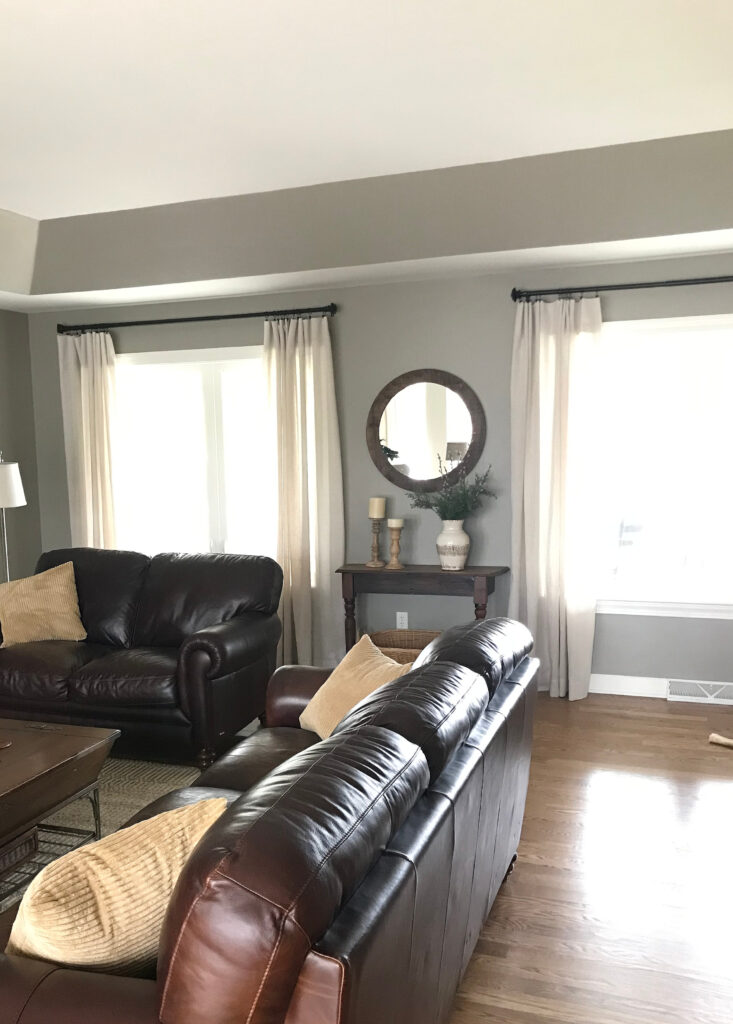
A vignette can be as simple as this table with the mirror and decor pieces in front!
The foundation piece will be the backdrop to your horizontal display. It’s also the best way to set the stage for layering, an important part of your display!
EXAMPLES OF VIGNETTE FOUNDATION PIECES
- a piece of artwork/photography
- a mirror
- metalwork or woodwork that is wall-mounted
- wall-mounted tapestry
- clock (usually 30″+)
In this next photo, the carving is the foundation piece…
In this photo, the art on the wall is the foundation piece…

The little bowl needs to be shifted to the right, not lined up.
And you can’t just hang it all willy-nilly; you’ll want to hang it based on some guidelines I’m not going to go into here as it’s a ton of info. Instead, once you’re done reading this blog post, check this out: The Right Height to Hang Artwork
Please note that you’ll ALSO need this next piece!
STEP 2: PLACE YOUR ANCHOR PIECE
If you don’t have a wall space behind your decorative zone, your anchor piece is the FIRST PIECE in your arrangement!
The ANCHOR piece is your MAIN decorative piece that’s going on your flat surface. If you don’t have a wall behind your surface, this anchor piece is even more important as it is the piece de resistance of the whole display! In the last photo, the chair is the anchor piece.
This next photo shows a great example of an anchor piece, just not in the right place for a vignette!
Sherwin Williams Pure White
Examples of an anchor piece…
- vase with or without flowers/branches in it
- LAMP (oh, I LOVE having light in a vignette!)
- stack of books with a decorative item on top
- slightly larger scale, dominant decorative item
- leaning piece of artwork (which is really more of a foundation piece)
- chair or bench if you’re decorating a floor space
The anchor piece is often the tallest item in a vignette. So, you’ll want to place it slightly further back if possible. It can also be the LARGEST instead of the tallest.
In this next photo, while there is wall space behind the shelf, it isn’t suitable for hanging art…
This shelf is in an entryway and the little tray holds keys.
In this case, the plant is the anchor as it’s the TALLEST and the STRONGEST item via its colour/contrast.
STEP 3: PLACE YOUR SECONDARY PIECE
Secondary pieces are often the second largest or most noticeable items. Alternatively, they can be one of a pair (and the other one would be your finishing piece in Step 5). Secondary items should not be as strong or noticeable as the anchor but should still add value to the display and connection with the other pieces via color, texture, theme, etc…
Your secondary piece will usually go to the left or right of the anchor.
The secondary piece could/should be:
- smaller and/or not as dominant as the anchor
- placed a bit to the right or left of the anchor
Examples of secondary pieces (assuming they HAVEN’T been used already as an ANCHOR)…
- vase
- plant
- small stack of books
- decorative item
- framed photo
In the end, we’ll create a decorative triangle (once we add the final item) – SO EXCITING!
In this next photo, I’m breaking the rules with the sofa table as it’s a bit long for a typical vignette, but it’s a GREAT example when combined with the coffee table.
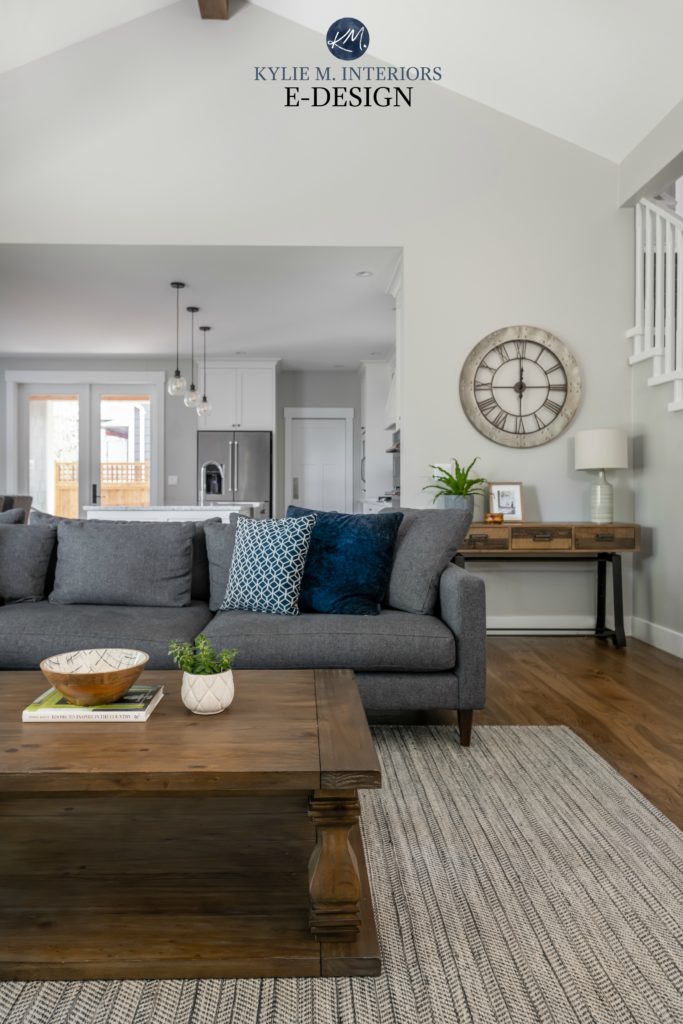
Benjamin Moore Stonington Gray
Notice how the coffee table’s colors (green, white, and wood) pick up on what’s happening on the sofa table in the background…
- Coffee table: What a fabulous group of three and the perfect mini-vignette!
- Sofa table: The plant is the anchor on the left-hand side, and the lamp is the only anchor on the right side. This homeowner valued simplicity, and I had to push her comfort zone even to get those items on there!
- Sofa table: On the left side, the frame is the secondary piece as it’s shorter, less visually strong, and to the right of the plant. Add the decorative wood bowl, and we’ve got our decorative triangle!
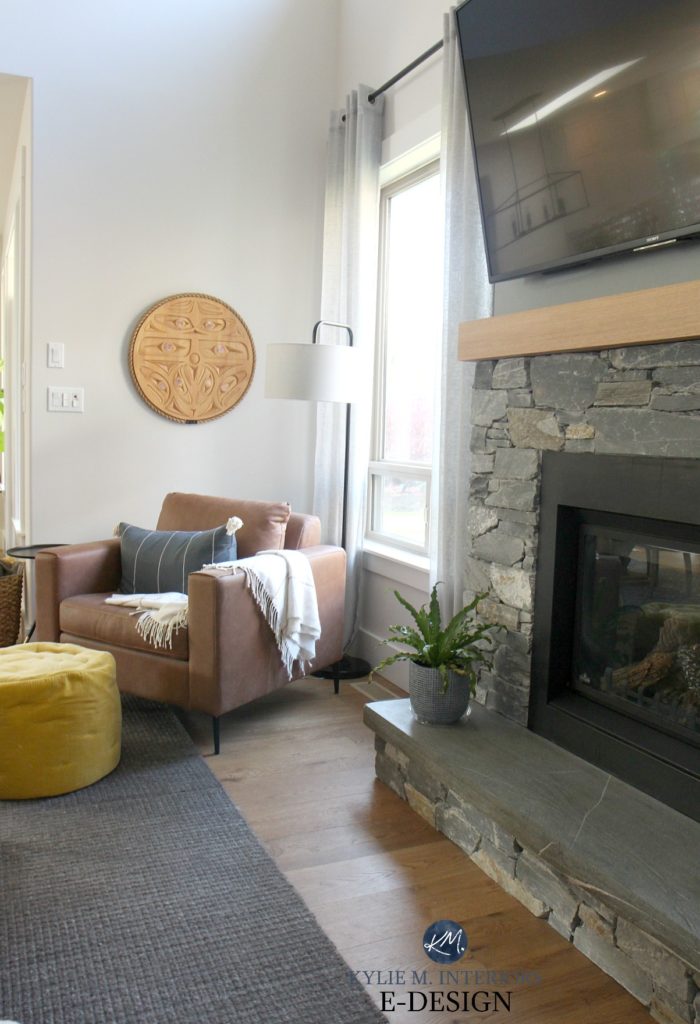
In this next example, you’ll see that only one item was needed on the narrow black sofa table (it has beach glass in it for interest). However, let’s look at the cabinet to the left of the fireplace…

Sherwin Williams Colonnade Gray
The foundation piece and anchor are in place, but the rest isn’t quite cutting it. How could it be improved?
- The flow would be better if the plant were on the far right side and the stack of books/decorative items was in the middle instead (the other small white item is a Google Home and could be tucked behind the lamp)
- Even better, a plant in a slightly smaller pot would’ve looked good on the stack of books right where they are. I would then treat the left side as its own vignette area, with the lamp, a small framed picture just to the right of the lamp (an approx 5×7 photo), and then the Google Home in front as our third (and necessary) item—sometimes function comes before fashion! That grouping would give us a nicely layered decorative triangle and some nice stacking on the right-hand side.
Look at this simple vignette (set of three) with the wall hanging, Kleenex box, and plant – so simple and easy…

Sherwin Williams Aesthetic White Paint Color Review
Before we get to the FINAL piece, we’ll slip an extra step in…
STEP 4: LAYER & STACK YOUR DECOR
It’s vital to add depth to your vignette; the best way to do that is via layering and stacking. Layering, also known as staggering, involves having the tallest-largest item at the back (usually the anchor), the medium-sized piece to the side (usually the secondary piece), and the smallest in the front (the finishing piece). These should be staggered from each other, not all in a line/row. Arranging your accessories like this also hits my happy place regarding the Groups of Three rule.
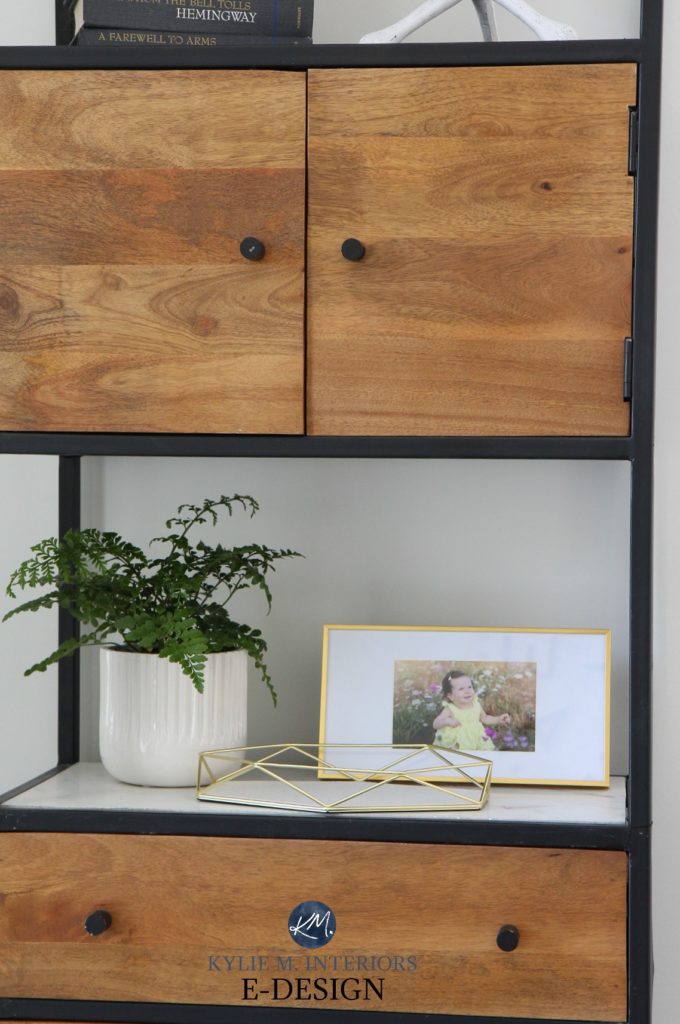
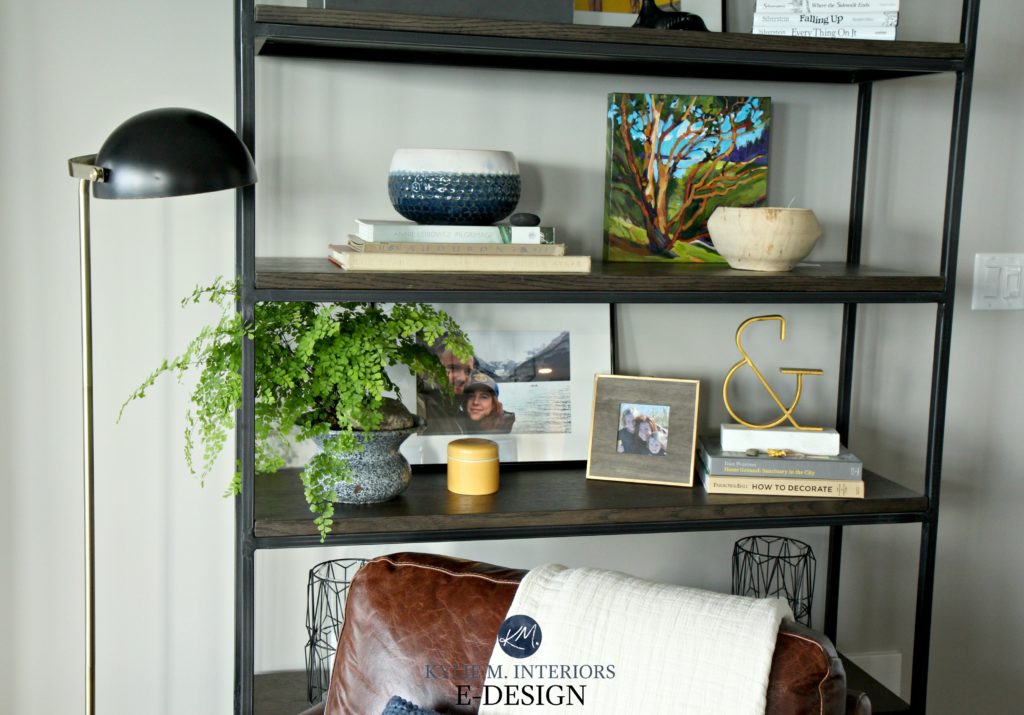
Let’s take another look at that photo from the beginning…
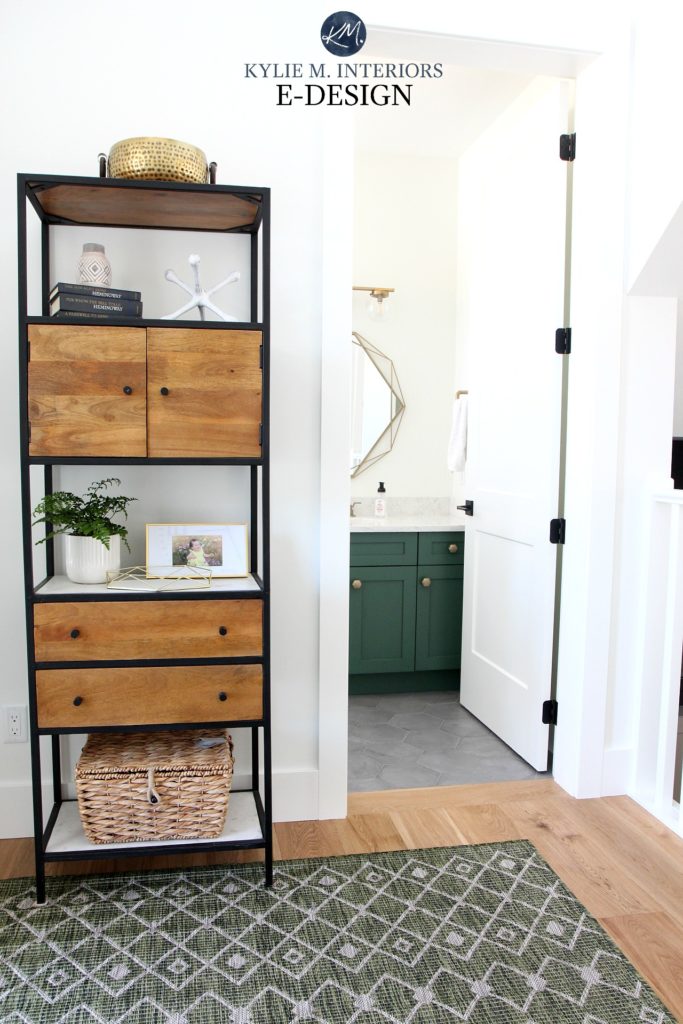
Stacking is another important element to a display and is a GREAT way to shift the eye and add visual interest, as shown in the above photo with the black books/small vase near the top. Stacking is where you place one item on top of another, almost ALWAYS involving a book(s) with a decorative item on top. To learn more about stacking, check out this blog post HERE.
In the above photo, let’s talk about what works…
- Each shelf has its vignette, with either ONE item or THREE
- The green accent color is noted in three places – the plant, rug, and bathroom vanity. Even though they aren’t in the same exact spot, there is a clear color connection
STEP 5: ADD THE FINISHING PIECE
You’re almost done! Now, you need to finish it off.
Examples of finishing pieces (assuming they haven’t been used yet):
- horizontal books underneath the anchor or secondary item (this is one of my favorite finishing piece ideas)
- trinket bowl
- small framed photo
- smaller version of a secondary piece (i.e., a candle holder that’s smaller than the other)
- small decorative item
This piece generally goes to the front, often between the anchor and the secondary piece. These floating shelves are beautiful examples of thoughtful layering and placement…

The Best Medium to Dark Green Paint Colors
In this next photo, the side table has a vignette on it…
- The foundation piece is the lamp.
- The secondary piece is the stack of books with the candle holder on top (yes, they can act as ONE!)
- The finishing piece is the bowl in front. I would just shift those books a bit more so that the covers face forward (another 15 degrees) and then tuck the bowl a bit further back, in between the lamp and books, creating more of a triangle.
In this next display, notice how your eye goes from the top of the leaves, down to the art and box, and then up to the candles – this creates a nice flow (the mirror is the anchor and a great backdrop)…

If things aren’t flowing, take a peek at this quick checklist…
- Do the colors all belong to the same color family/palette?
- Do any of the textures enhance or overwhelm the display?
- Do your items SUIT each other, or do they fight?
- Have you staggered things the right way? Do you need more layering?
- Do you have a solid foundation piece and anchor?
- Do you have VARIATION in the finish (i.e., not all crystal finishes or all wood)?
This next bookcase is full of loving pieces and store-bought decor. Notice how each shelf flows independently and how it relates to the shelves above/below it.
Okay, are you exhausted? I’M NOT – I COULD DO THIS ALL DAY LONG! But seriously, that’s probably enough for this blog post…
READ MORE
Furniture Layout & Decorating Ideas: Balanced & Symmetry
The Best WHOLE HOME Warm & Neutral Paint Colors
How to Create a TIMELESS Home: 4 -PART SERIES
4 Easy Steps to Accessorize a Mantel
The Right Height to Hang Artwork and Mirrors
NEED HELP?
Check out my E-Books & Online Paint Colour Consulting packages
Chat soon,

Originally written in 2017, awesome updated in 2023


