
Posted on June 22, 2022 by KylieMawdsley
THE WINE SHRINE ON A DIME
As you probably know (based on my last blog post), I wasn’t super pumped about the bar area in our family room. I LOVED that it was there; I just didn’t love it as it WAS.

This post may contain affiliate links. If you make a purchase through links on our site, we may earn a commission.
The bar had many fatal flaws, including the following:
- a layout that blocked off the bar area from the rest of the family room
- fugly colors
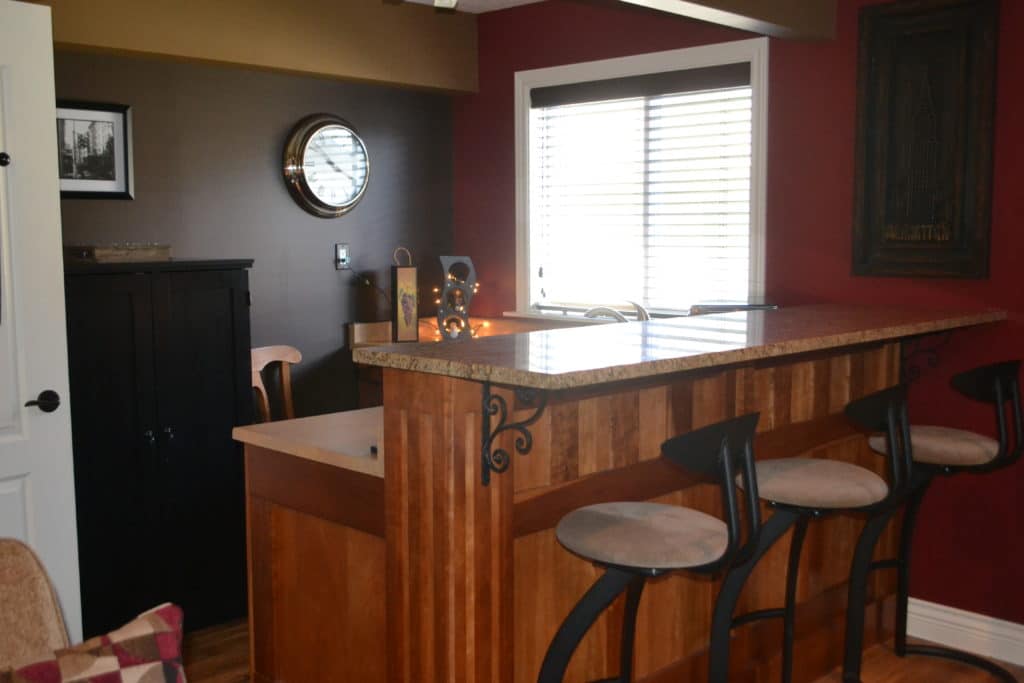
- a peninsula that was over the average bar height, making it awkward to sit at
- a big bare back wall that was hard to decorate – it was awkward no matter WHAT I did
- no room for a wine fridge
Let me repeat that last point – NO ROOM FOR A WINE FRIDGE. Epic fail.
So, when we did my office renovation, it only made sense to redo the flooring. And with re-doing the flooring, it ONLY made sense to redo the BAR.
Why?
Because that’s how I roll, and really, I can convince Tim of just about anything if I wear the right pants.
However, seeing how this area was tagging on to the end of my office remodel, I had to be careful with the costs. And sure, I say ‘on a dime’, but it was a weeee bit more than a dime. That being said, I’ve worked on homes with bars and wine rooms that cost 10’s of thousands of dollars, so what I spent is just a drop in the bucket – or that’s what I tell Tim anyway.
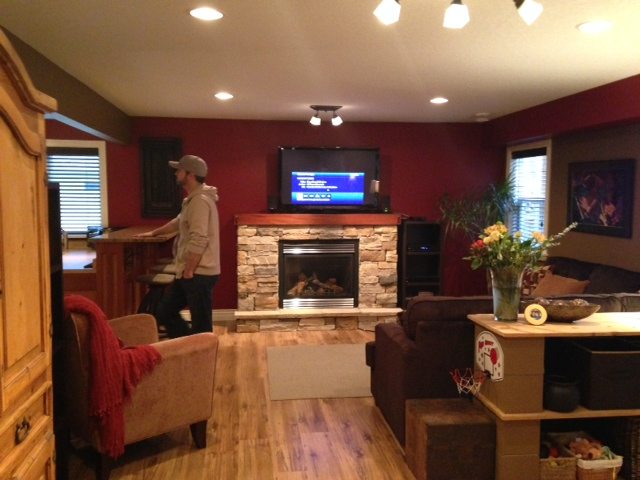
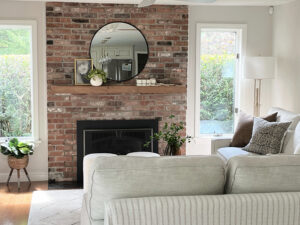
This was the view when you stood near the back of the family room with the bar to the left…
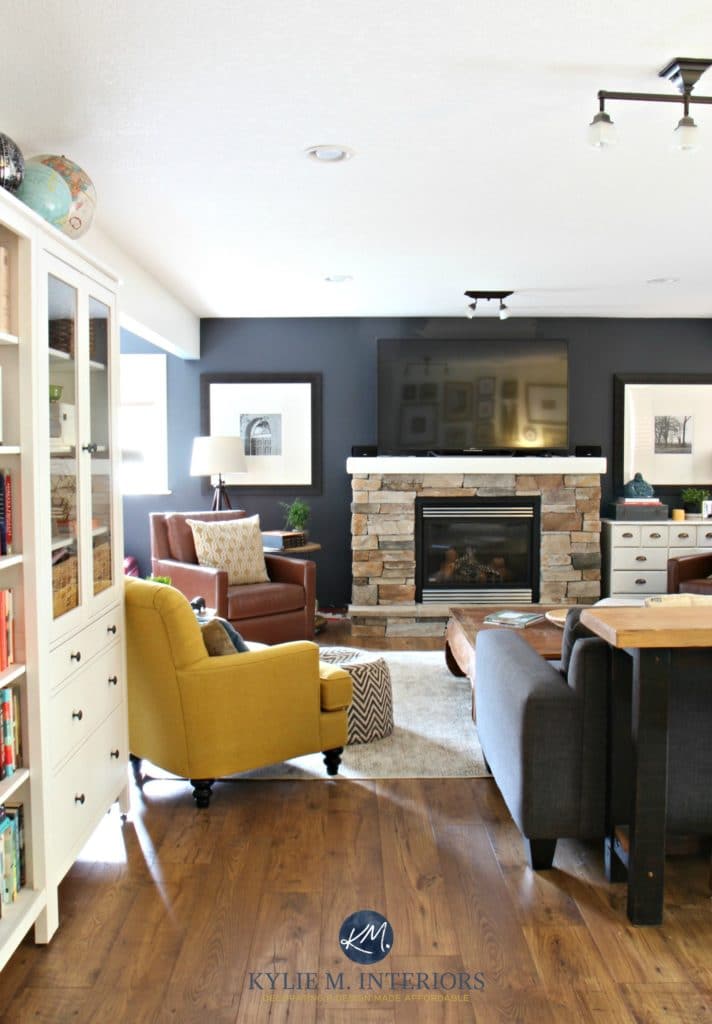
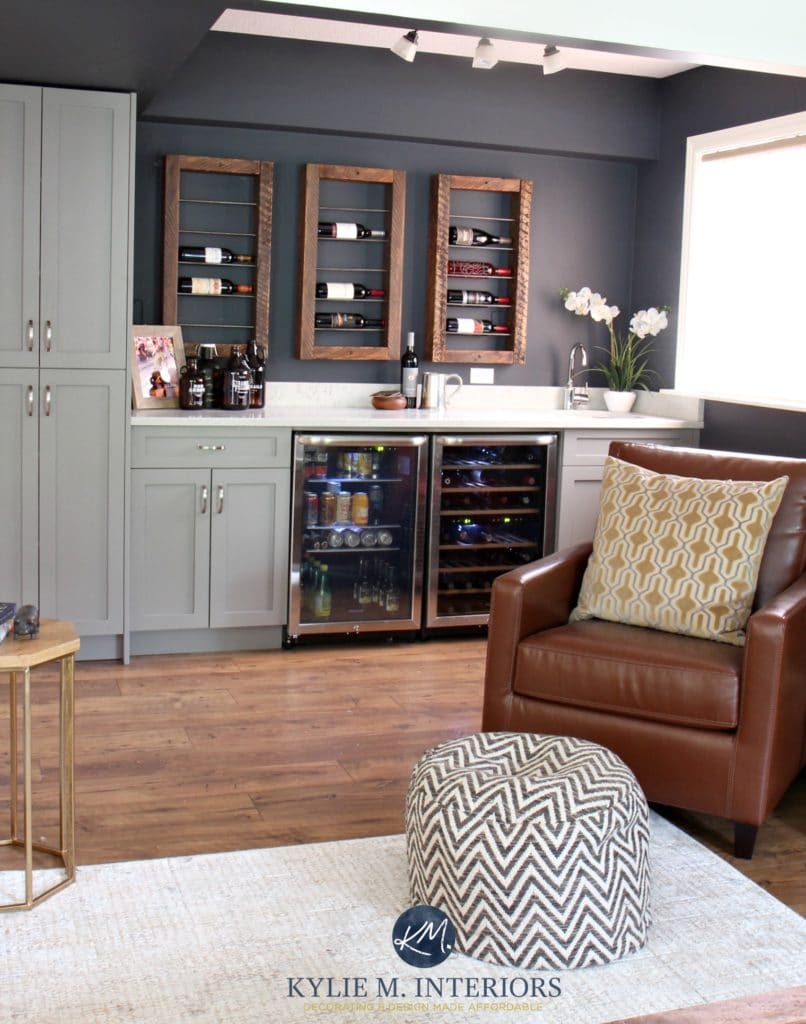
After, we have a new view into the family room, along with a wicked blue hue…
I want to spray the chrome grills on the fireplace to update it further – we’ll save that for another day
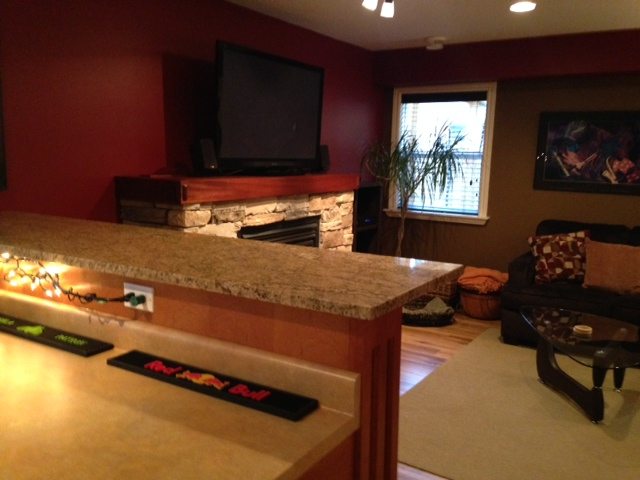
This was the view from inside the bar, into the family room – dark, drab, and dated…
And this is the view now…
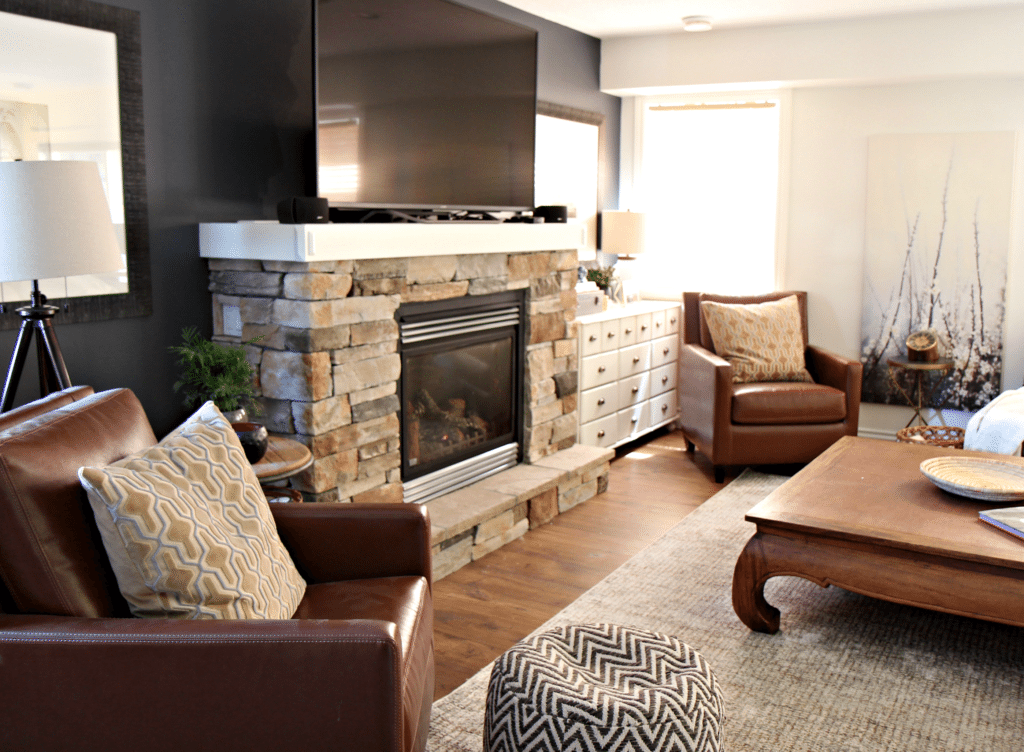
That’s right – no more sneaky bar blocking any decent furniture layout, and the light now FLOODS into the rest of the family room from the bar window!
But where did the bar go? Not far…
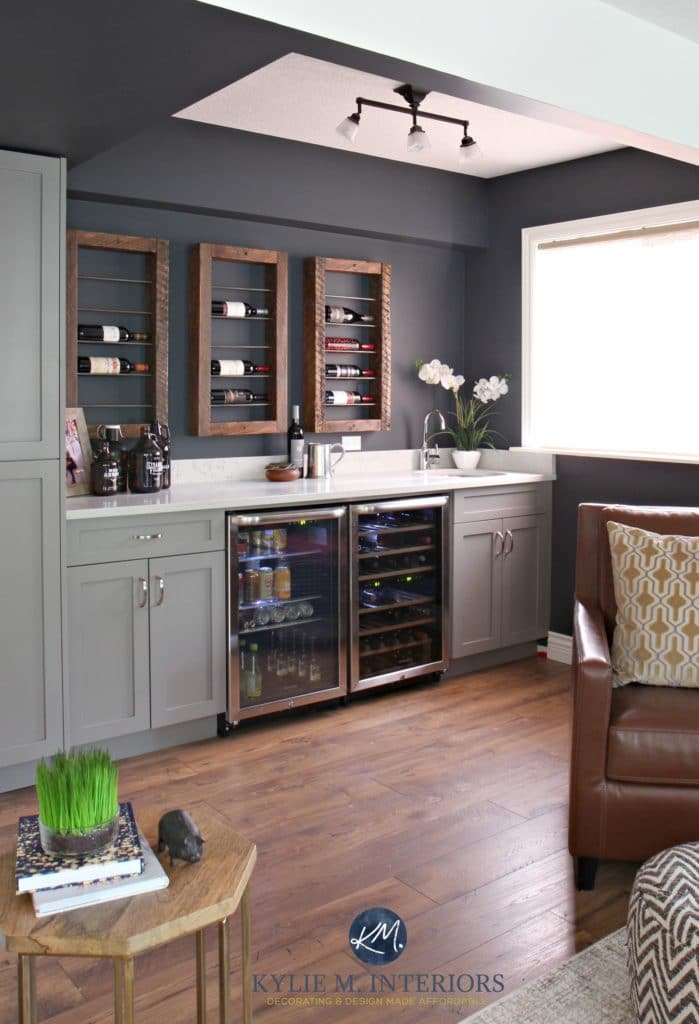
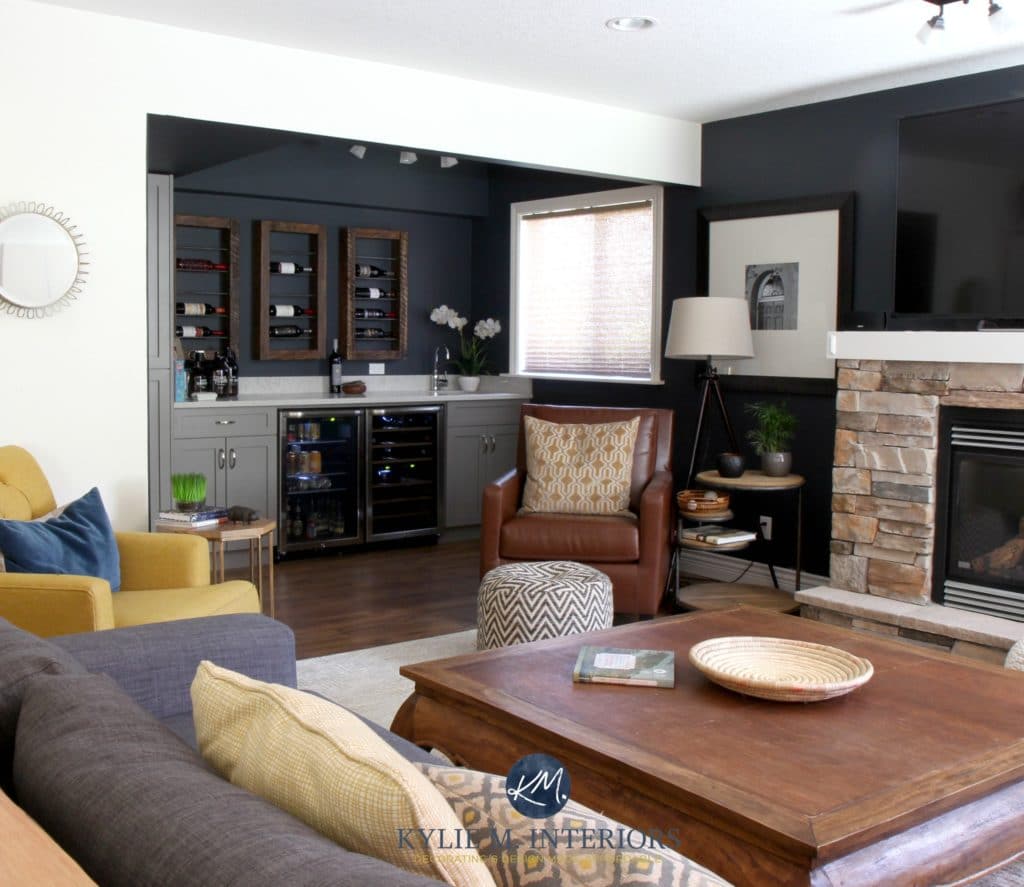
Instead of repeating the ‘L’ shape, I wanted a simple back bar that was ‘part’ of the family room, but more of a backdrop than a visual block. And remember, I am a decorator – a photographer I am not, so I do my best!
Before, as previously mentioned, it wasn’t a super functional bar area…
And now it’s like a TOTALLY different space…
The Best Kitchen Island Paint Colors
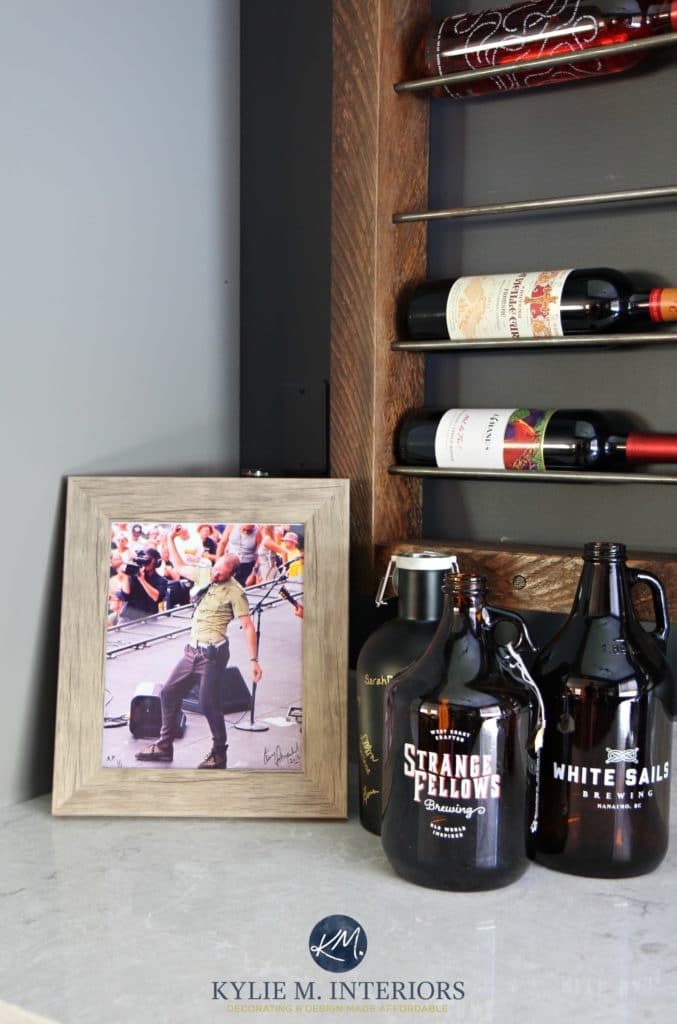
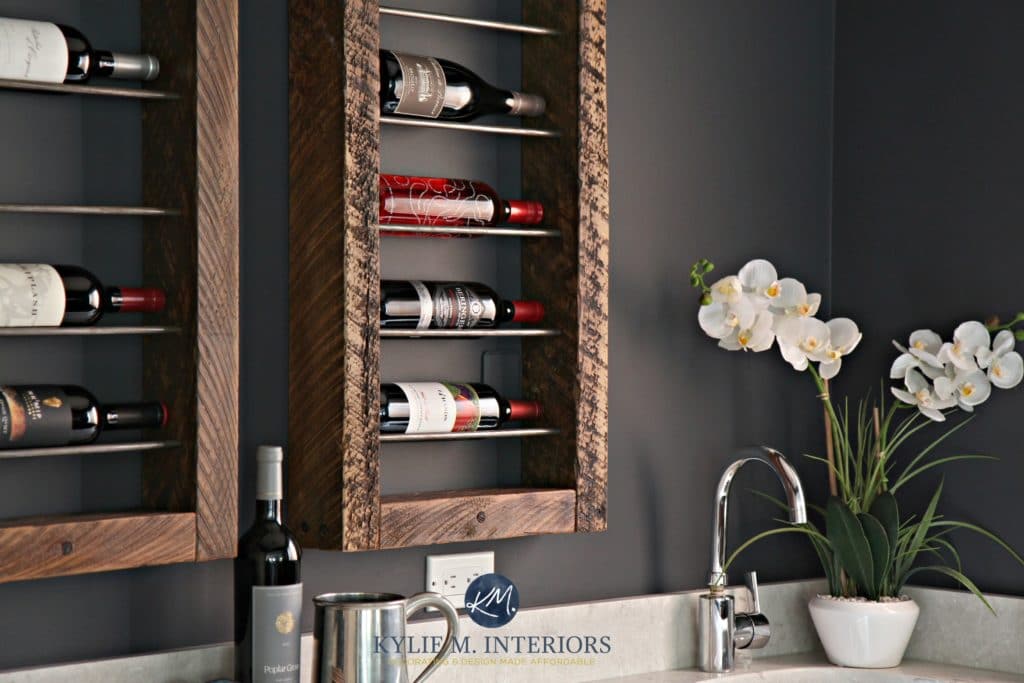
THE WINE SHRINE / DIY WOOD & METAL WINE RACK
I’ve seen my fair share of cubbies and crosses holding dozens of wine bottles, but I wasn’t going for ‘bulk’ storage – I was going for beauty (and affordability). I wanted something unique you don’t see anywhere, but that still aligned with the rest of our home. And I found it. Well, I didn’t really ‘find’ it. I drew up what I wanted and had a creative fellow named Christian make it for me out of 100-year-old barn boards!
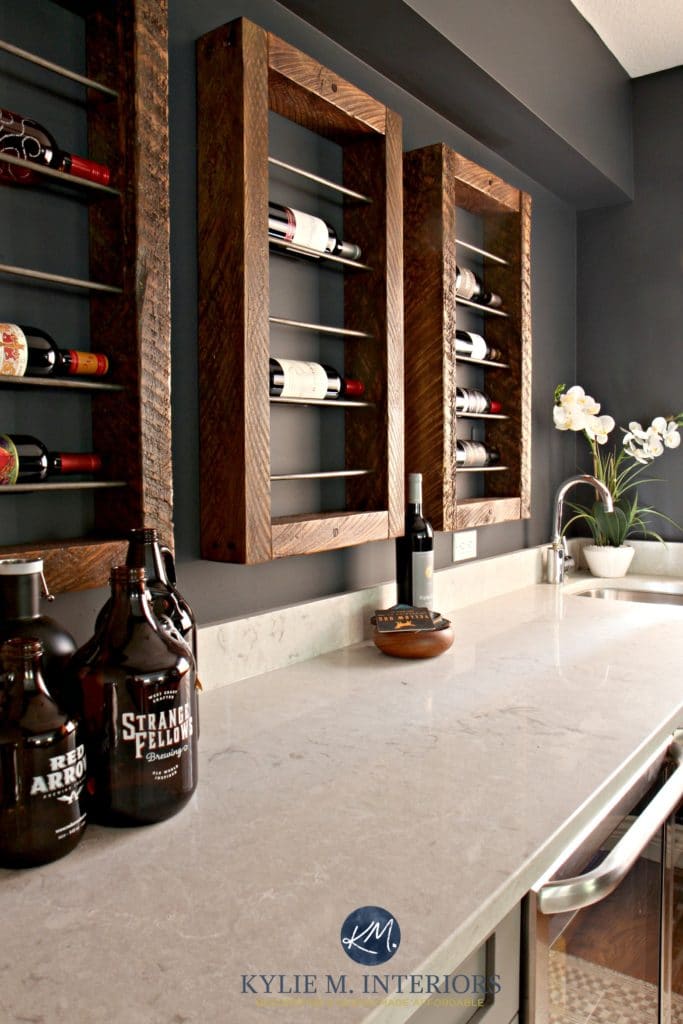
This is undoubtedly my FAVE DIY type project I’ve ever done (or not done, really; Christian did it, but I cheered him on!).
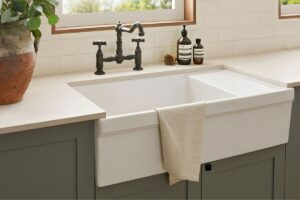
I chose the same gray quartz countertop (Caesarstone Bianco Drift) that went in our main bathroom remodel as I love its versatile range of neutrals.
And of course, Tim’s contribution…it ain’t a home bar without a little Gord Downie!
Seriously, just look at this wood (if I had a dollar for every time I’ve heard that…).

The 12 Best Navy Blue Paint Colors
COSTS
Wine and beverage fridges: Lowes $499 each. That might look like a double unit, but it’s two separate pieces that we just reversed the doors on and butted together. At $499 a piece, we saved some good moula.
Countertop: Caesarstone Bianco Drift and undermount sink $1900. We did not…save any money with this choice, but it had to be done.
Wine racks: $180
Cabinets: Mid Island Cabinets $1800. I love the soft gray of the cabinets and how it plays with Bianco Drift—in the words of the great Goldilocks – not too dark, not too light – juuust right.
Paint: Sherwin Williams Cyberspace
Grand Total: Under $5000
So, there you have it; the family room is complete!
READ MORE
6 Budget-Friendly Home Update Ideas
5 Ideas to Update Your Fireplace
NEED HELP?
CHECK OUT MY ONLINE PAINT COLOR PACKAGES!

ORIGINALLY WRITTEN IN 2017, UPDATED AND TWEAKED IN 2022
Comments
Leave a Reply
More Posts
The 5 Best Creamy White or Off-White Paint Colors
THE ELUSIVE ‘CREAMY WHITE NEUTRAL’ When it comes to light, warm neutrals, it’s all in the undertones. And other than pink and green, yellow is the undertone many of my
Read More
The 8 Best Warm Neutral Paint Colors With NO Yellow Undertones!
The Top Light Depth, Warm Colors That Aren’t Cream! When choosing the best warm neutral paint color for your home, whether creamy white, beige, taupe, or greige, your choices are
Read More
The 12 Best Farmhouse Sinks of 2024
FIND YOUR DREAM SINK HERE… While traditional farmhouse design was all the rage in previous years, the embers have definitely cooled. As for MODERN farmhouse, it’s still kickin’ its cowgirl
Read More


Utterly fantastic room makeover!!! May I ask what the cabinet color is and also what the ceiling white color is? I’m thinking about SW Cyberspace for parts of my basement but probably need some medium-gray walls as well. I want my ceiling to be a very crisp white, just like what you did here. I also have to deal with trim and am not sure whether that should be the same bright white as the ceiling or something slightly different. I would appreciate any suggestions.
Author
Hiya! It was actually a colour offered by the cabinet company and not a regular BM or SW colour – it was VERY close to BM Metropolis though (or similar to SW Dovetail). The ceiling, it was original and we never painted it, but I do love BM White Dove or the cleaner look of SW Pure White and YES, I would do the trim/ceiling the same colour in the ideal world 🙂
Thank you! This is incredibly helpful. I’ve noticed online that the best and most confident designers share their ideas, paint choices, etc., while lesser ones sometimes hoard what they know. I’ve spent enough time looking at your excellent work online that I knew you would fall into the first category. You did not disappoint. Anyway, great room renovation and thanks for your help with mine.
I am SO happy I saw this post before I had my new townhouse painted. I copied this and put Cyberspace on the walls and Light French Gray on our bar cabinets – I am OBSESSED! Thank you for inspiring me!!
Do you have the measurements on the wine racks or your friends info to make some for us? Thanks!!
Author
Hi Meryl! We’ve actually moved, so I don’t have the measures, and he’s not doing that work anymore! I know it was tricky figuring out the distance to effectively hold the wine bottles, while leaving a good distance to get them in and out. I’m sorry I can’t help more!
Does your friend sell the wine racks
Author
I WISH, sadly, no…
Just copied the wine racks but need to know how you hung them on the wall please!
Author
You bet – that was a hard one to figure out! Notice there are two ‘plugs’ in the center top and center bottom of the surrounding frame. That’s where we had a hole predrilled and then screwed them to the wall via that and made sure we went into studs. With the amount of weight, next time I might do two on the top, two on the bottom and use SUPER strong anchors or at least hit a stud with one.