Posted on March 1, 2013 by KylieMawdsley
Artwork or Photo Gallery Ideas for Stairs
This post may contain affiliate links. If you make a purchase through links on our site, we may earn a commission.
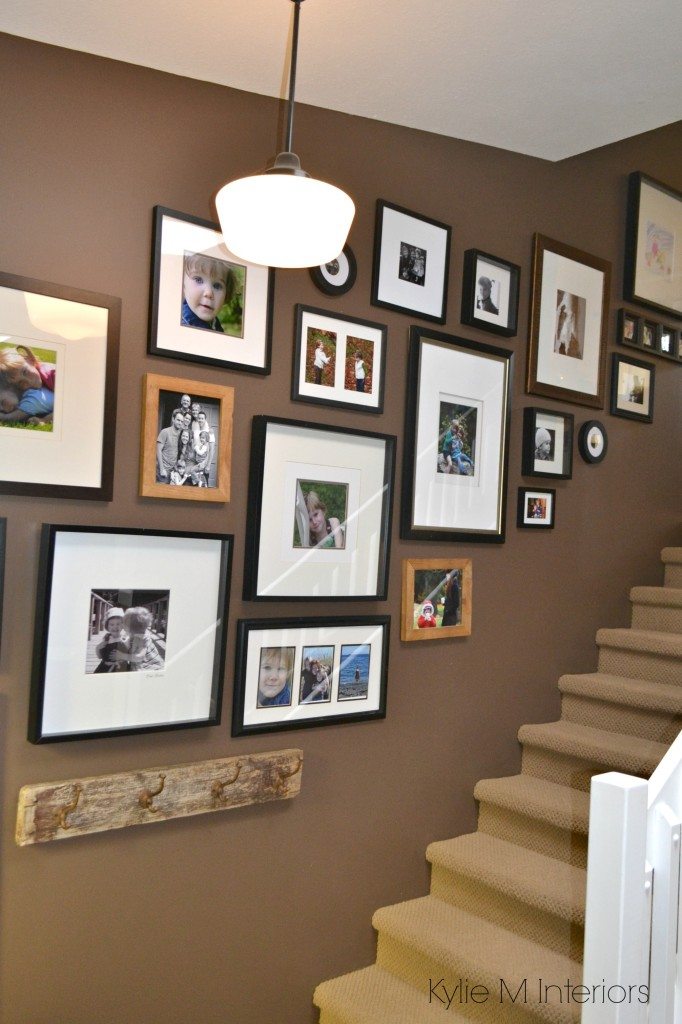
Making a photo display in your stairway is a great way to show off your pride and joy! And it’s not just a great idea for family photos, it’s also great for pet lovers, world travellers or just exceptional photographers.
Placing “like” items in a grouping enhances their impact.
Here are some of the frames you will need…
1. 3-5 Dominant Frames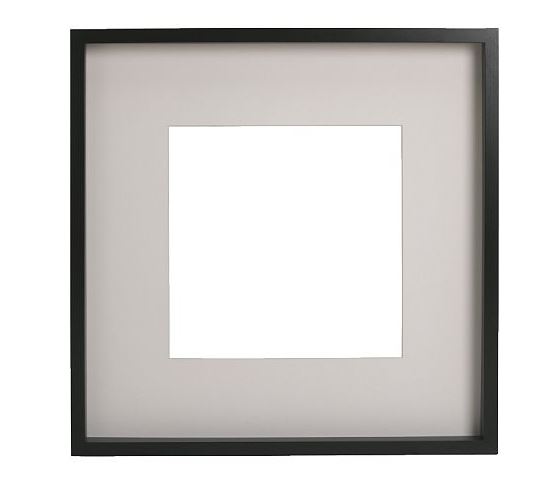
Large/stairwell displays use more dominant pieces whereas a standard wall display uses 2 at the most. These dominant pieces are the pictures that are usually the largest and most striking. For most of my displays, I use Ikea’s Ribba 20×20 frame as my dominant piece.
2. 1-3 Bridging Frames
These are the frames that will be used to link your dominant pieces on a standard wall display. A bridge piece is usually a frame that accommodates 2-3 photos (approx 4×6 or 5×7’s) in a horizontal row. For a stair display, you may substitute a few filler pieces for a bridge piece if you aren’t familiar with making displays.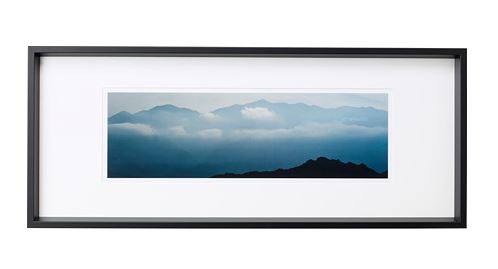 Another great Ikea option is something like this (if you just take their image out and replace it with yours) Olunda Picture Frame.
3. Filler pieces
These frames are the ones that fill in the space around your dominant and bridge pieces. Make sure you have a nice mix of 8×10’s/4×6’s/5×7’s/etc…You’ll want to leave approximately 3-4″ between each picture.
- Generally, it’s better if the majority of the frames look similar to one another. For example, 95% of my frames are black frames with white mats. I threw in a few different ones just for
shits andgiggles. - You can choose to have all of your photos in black and white which is a striking and cohesive look. However, don’t be afraid to mix it up with colour photos here and there.
Remember this is YOUR wall, make sure it’s pictures that you love to look. And these are just some ideas to get you started, feel free to throw in a bit of your own creativity!
Also, you will find the process a LOT less painful if you make paper templates of each frame and hang them on the wall BEFORE you get the hammer and nails out, this way you can get a general feel for the flow and layout.
Step 1 Place your dominant pieces staggered evenly up the stairwell
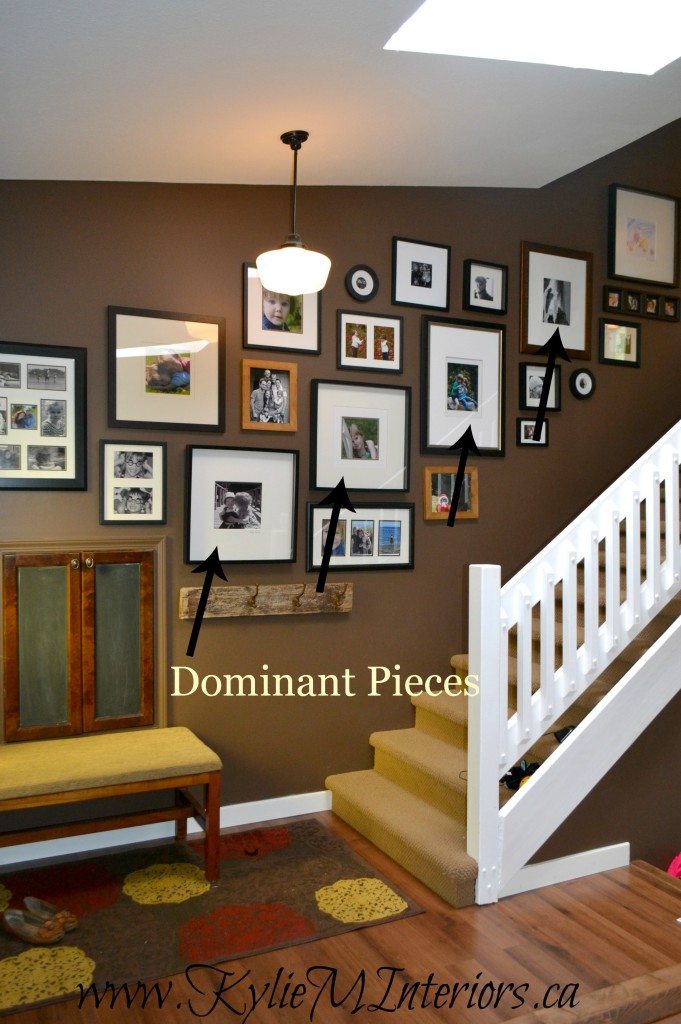
Whatever angle your stairs are, you’ll want your pictures to rise on the exact same angle.
Now here’s where it gets fiddle-farty. The bottom right corner of each frame should be approx 40″ from the step it’s related to. If it crosses 2 steps then relate it to the higher of the 2 steps. (Relating to means the stair that it is positioned above)
Step 2 Add 1-3 Bridge Frames
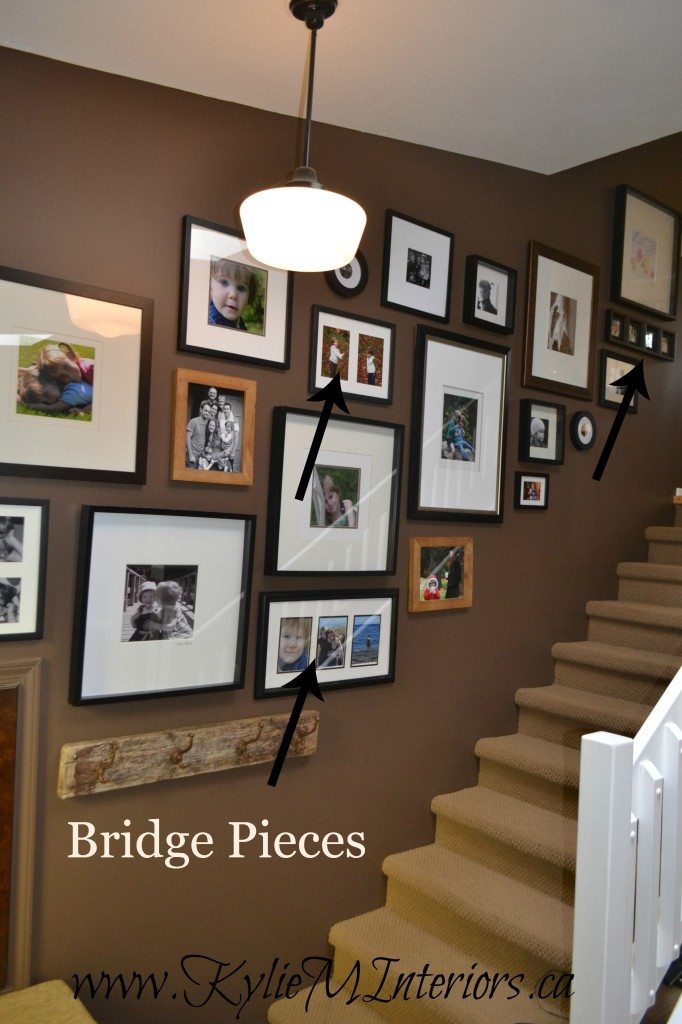
Depending on your layout (and your comfort zone) “multi-frames” can look great to really enhance the stepped-up look. They are also a great grounding element to your dominants and will slow down the busy-ness of too many filler pieces as they combine 2-3 photos in one frame.
Step 3 Fill in the blanks with Filler Frames
You can use a wide variety of shapes and sizes. Go horizontal, vertical – mix it up. Again, keep the distance between frames no less than 2″ and no more than 4″ apart if you can help it.
Chat soon,

Read more: The Right Height to Hang Artwork and Mirrors
Comments
More Posts
The 5 Best Creamy White or Off-White Paint Colors
THE ELUSIVE ‘CREAMY WHITE NEUTRAL’ When it comes to light, warm neutrals, it’s all in the undertones. And other than pink and green, yellow is the undertone many of my
Read More
The 8 Best Warm Neutral Paint Colors With NO Yellow Undertones!
The Top Light Depth, Warm Colors That Aren’t Cream! When choosing the best warm neutral paint color for your home, whether creamy white, beige, taupe, or greige, your choices are
Read More
The 12 Best Farmhouse Sinks of 2024
FIND YOUR DREAM SINK HERE… While traditional farmhouse design was all the rage in previous years, the embers have definitely cooled. As for MODERN farmhouse, it’s still kickin’ its cowgirl
Read More